March 25th Auckland Airport NZ: Ultimate Skinny SIM Card Setup Guide
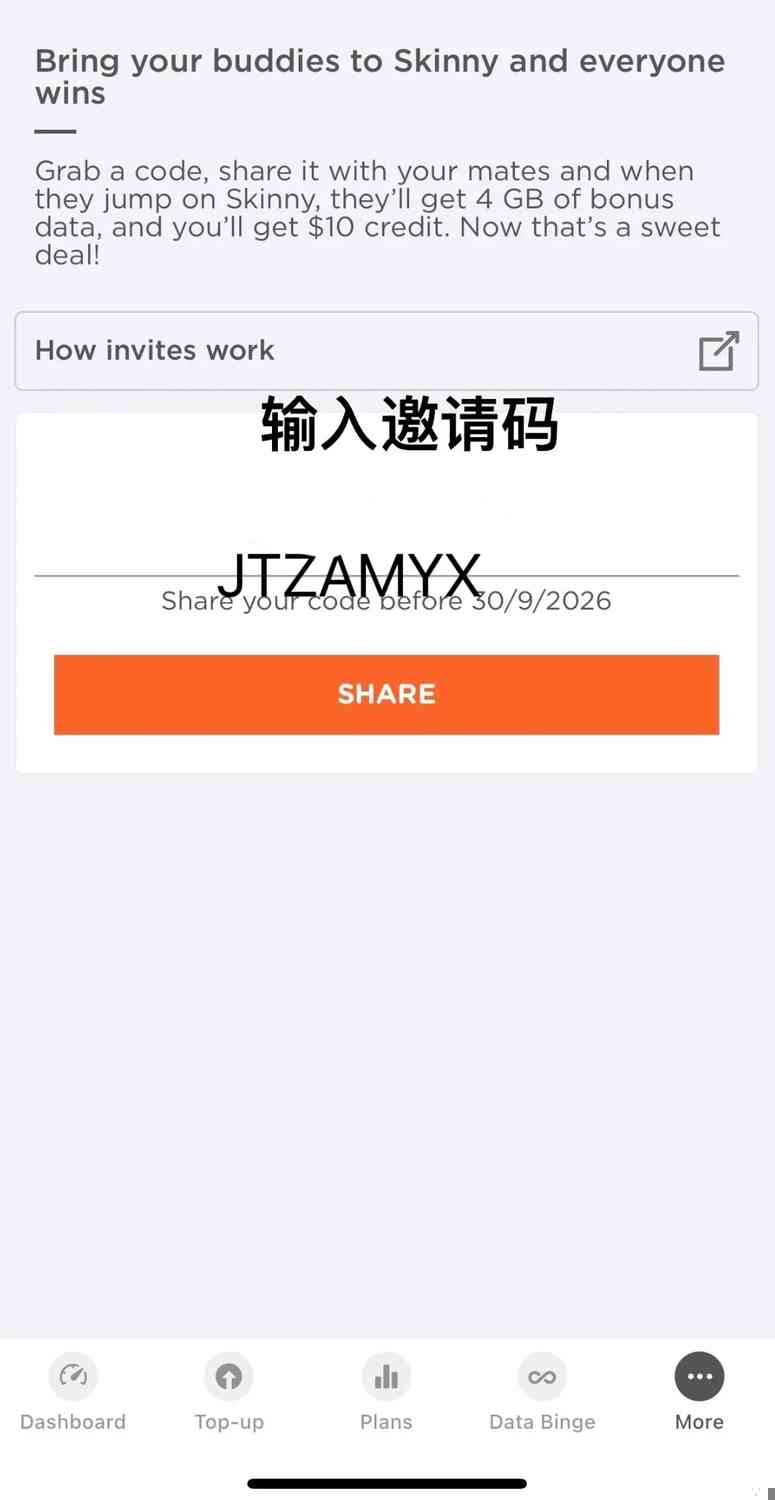
Traveling to New Zealand? Say goodbye to data worries with this handy guide to the Skinny SIM card. Use the referral code JTZAMYX to snag an extra 4GB of data—valid for March and April!

📌 **Purchase Method**
As soon as you step out of customs, look for the eye-catching purple Spark store right in front of you. Just tell the friendly staff that you’re after a Skinny SIM card, and it’s yours for just $2!
📌 **Activating the SIM Card**
Pop the SIM card into your phone and dial 456. After you hear the beep, you can hang up. Your SIM card is now activated! Make sure to snap a photo of the phone number on the card or keep the card itself for future reference.
📌 **Download and Register the Skinny App**
If you find yourself without data upon arrival, no need to stress. The airport offers free Wi-Fi, so connect and download the Skinny app. If the app isn’t available, simply switch your Apple ID address to New Zealand or another region. Once downloaded, open the app, register, and enter the verification code to activate your phone number.
📌 **Recharge Steps**
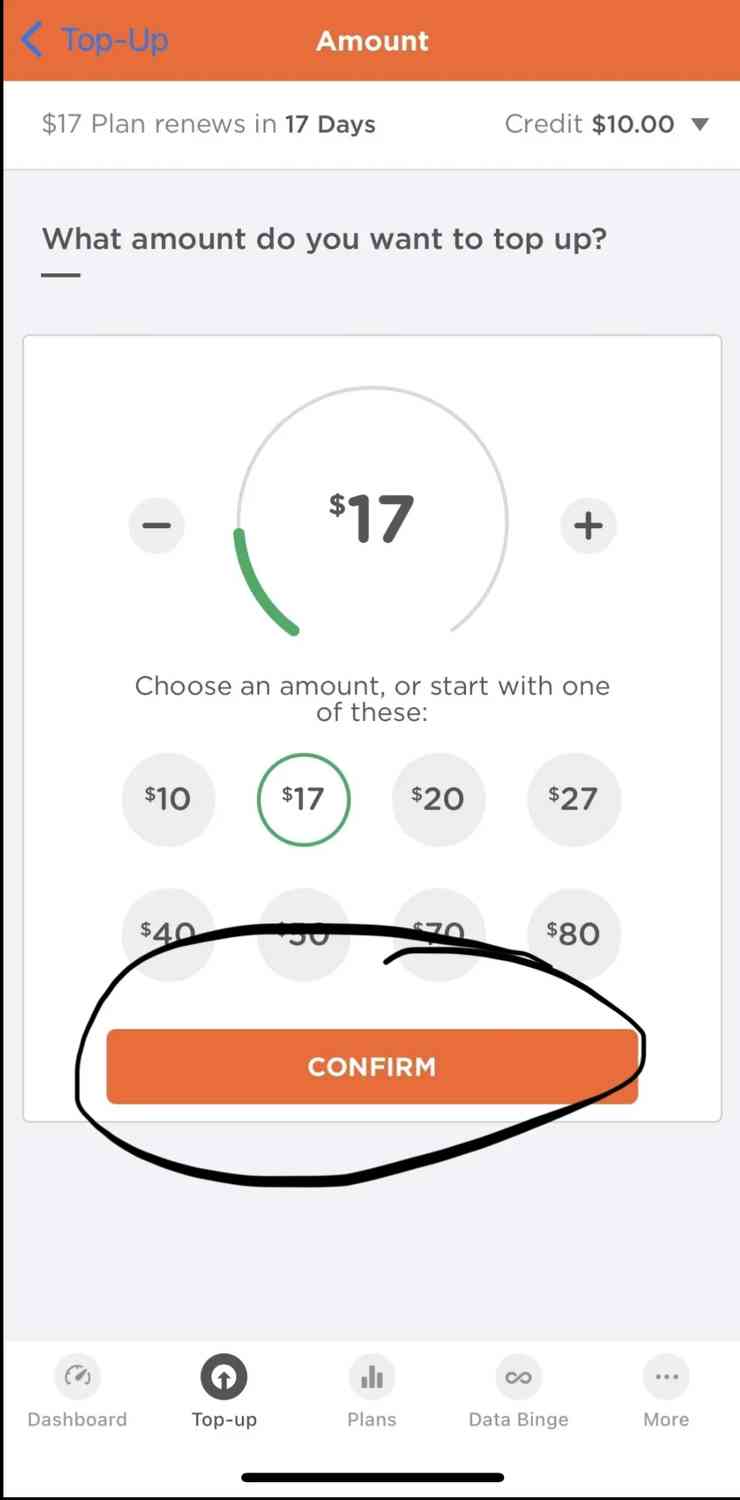
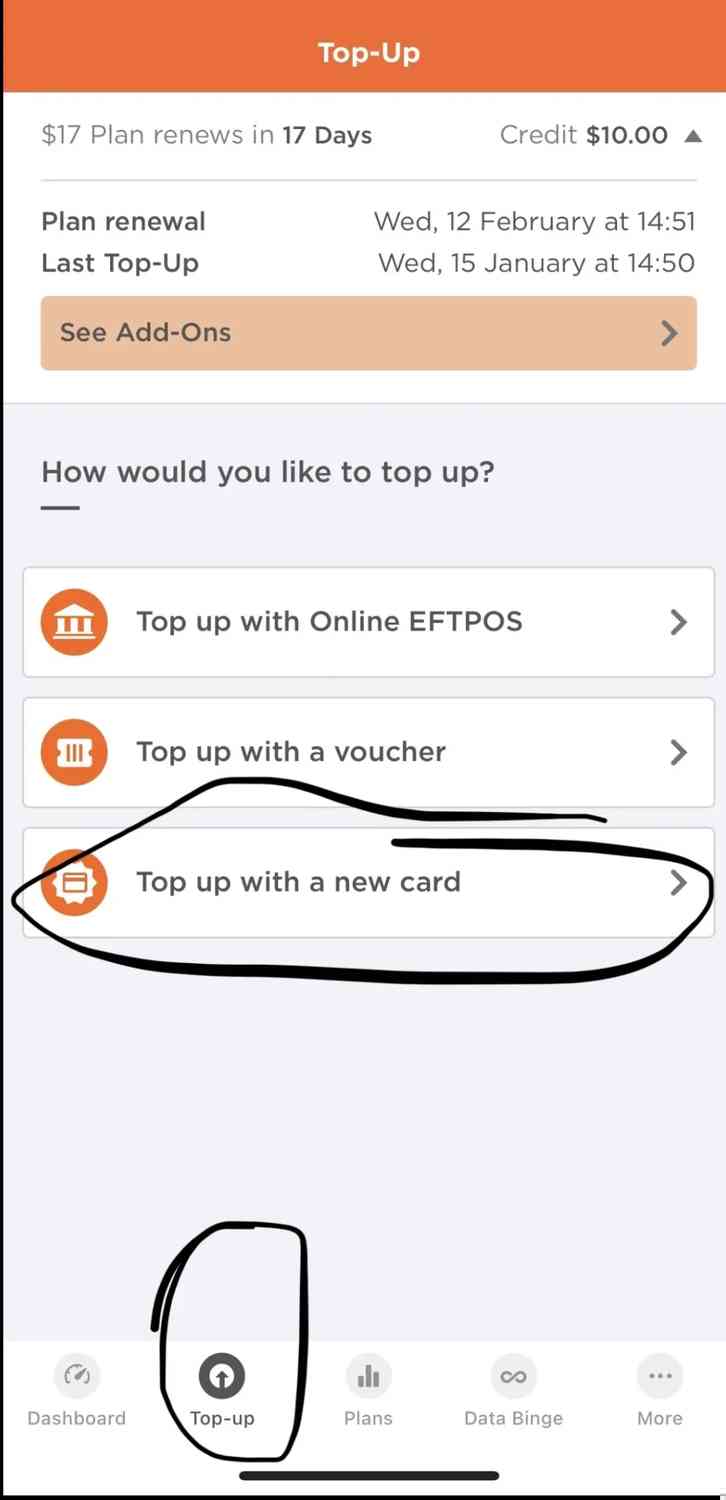
1. Tap on “Top-up” and select “Top up with a new card.”
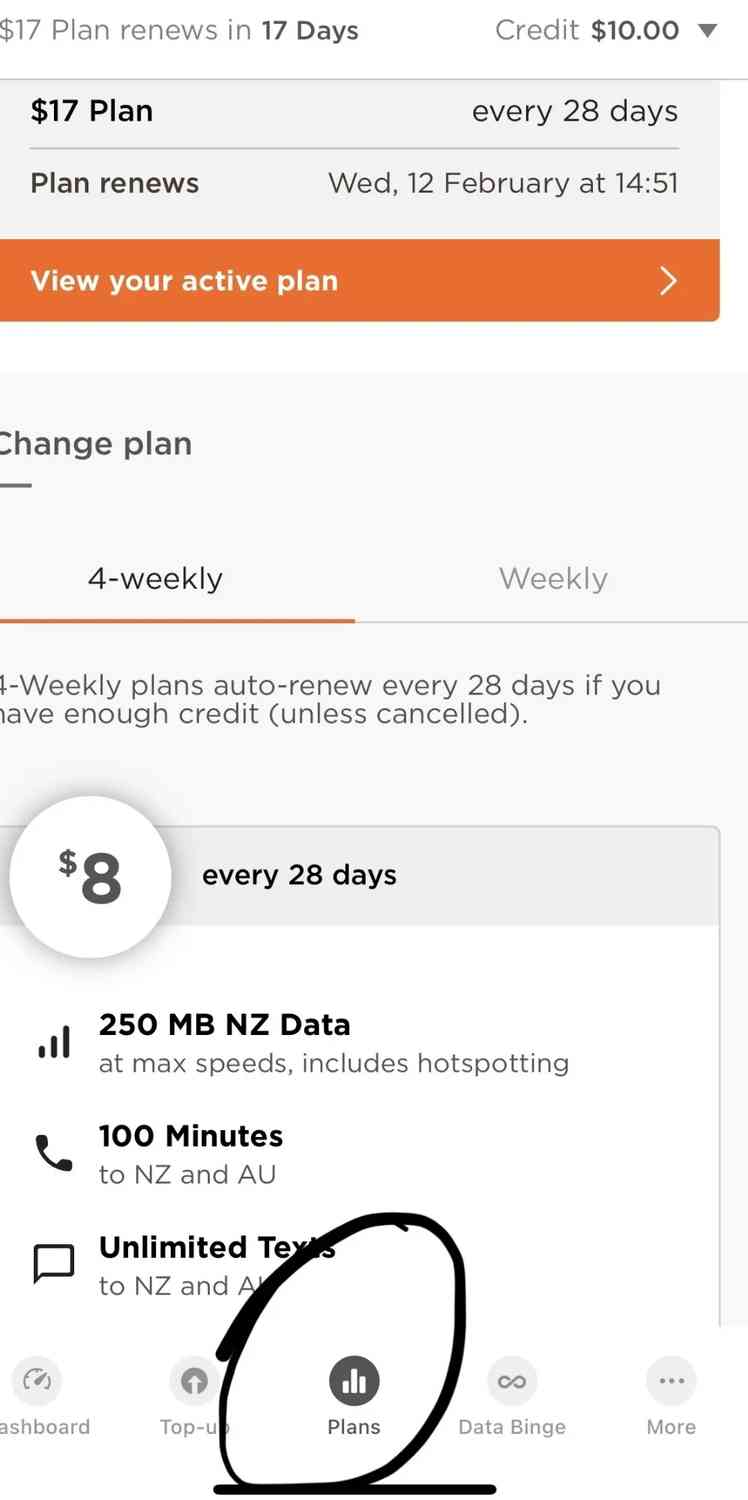
2. Choose from various plans like $5, $10, $17, $20, and more, depending on your needs.
3. After selecting your plan, click “CONFIRM” and enter your Visa card details.
4. Once the recharge is successful, check the “Credit” in the upper right corner to see your balance.
5. Next, go to “Plans” to buy a package. Don’t forget to enter the referral code JTZAMYX for that extra 4GB of data!
📌 **Tips for Extra Benefits**
On the Dashboard page, you’ll see your remaining data. Below that, there’s an option for “Get a sweet bonus.” Enter the referral code JTZAMYX and confirm to get an additional 4GB of data, bringing your total to 7GB. It’s a fantastic deal!

📌 **Additional Note**
If you’re in a rush to catch a connecting flight, no problem. You can purchase the card and ask the staff for a SIM eject tool to take with you. Set everything up at your next boarding gate; there’s plenty of time!
Follow these steps, and you’ll have seamless internet access throughout your New Zealand adventure. Save this guide for your upcoming trip and stay connected!

