This is your ultimate guide to galaxy viewing and photography, perfect for any scenario 🔭. Let’s embark on a stargazing adventure!
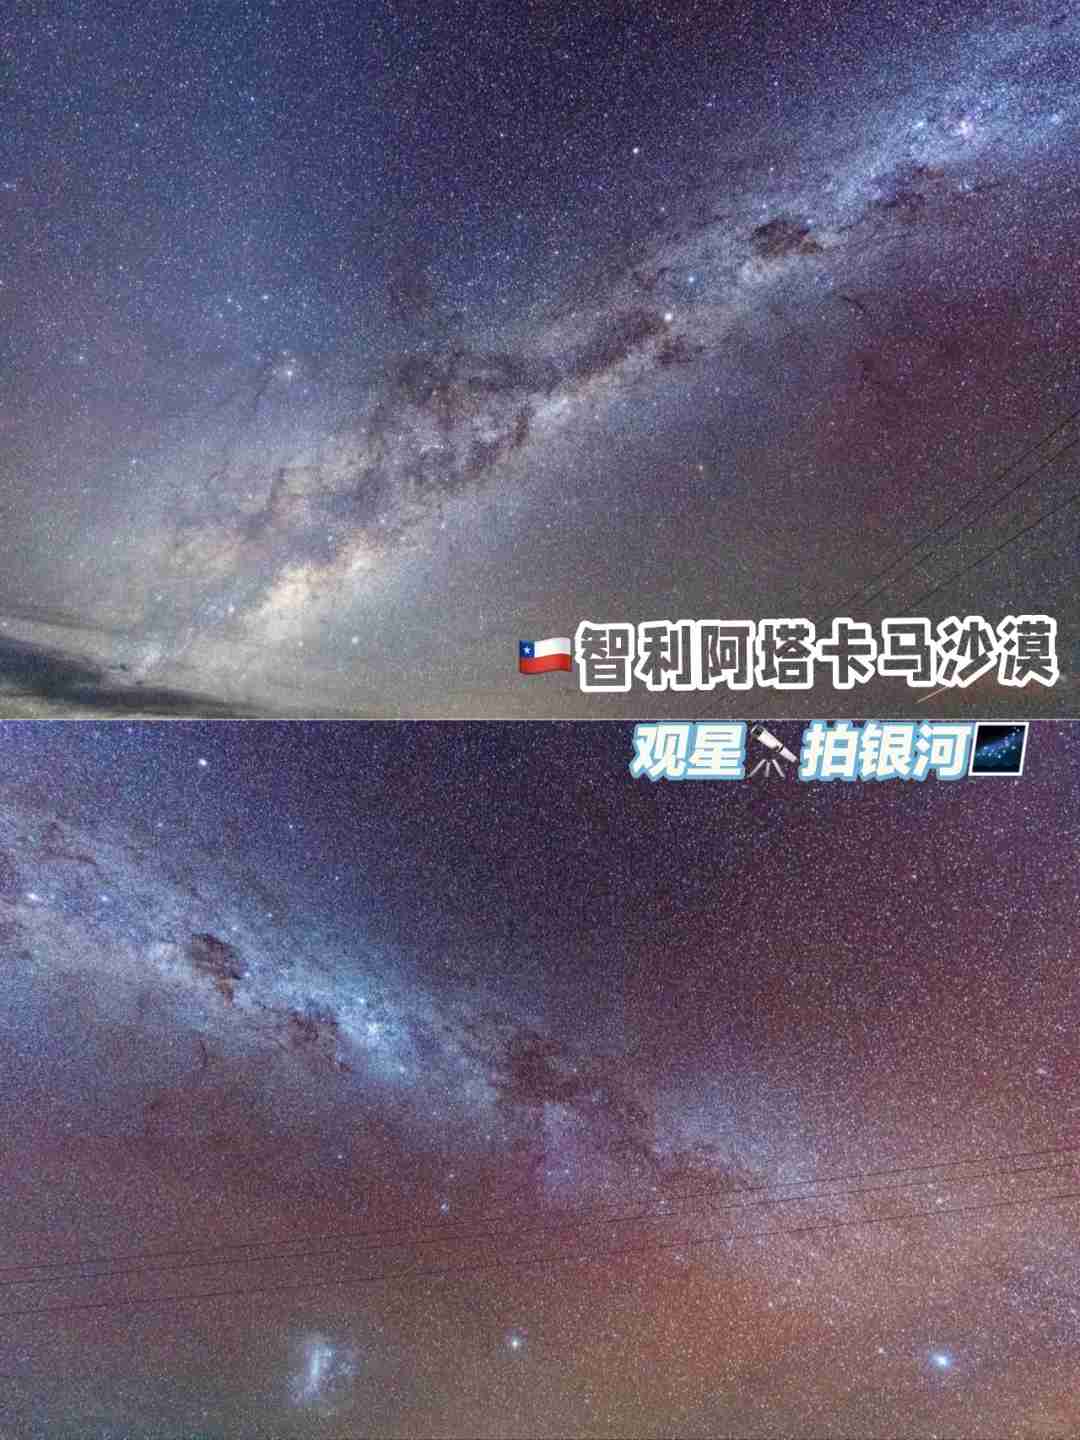
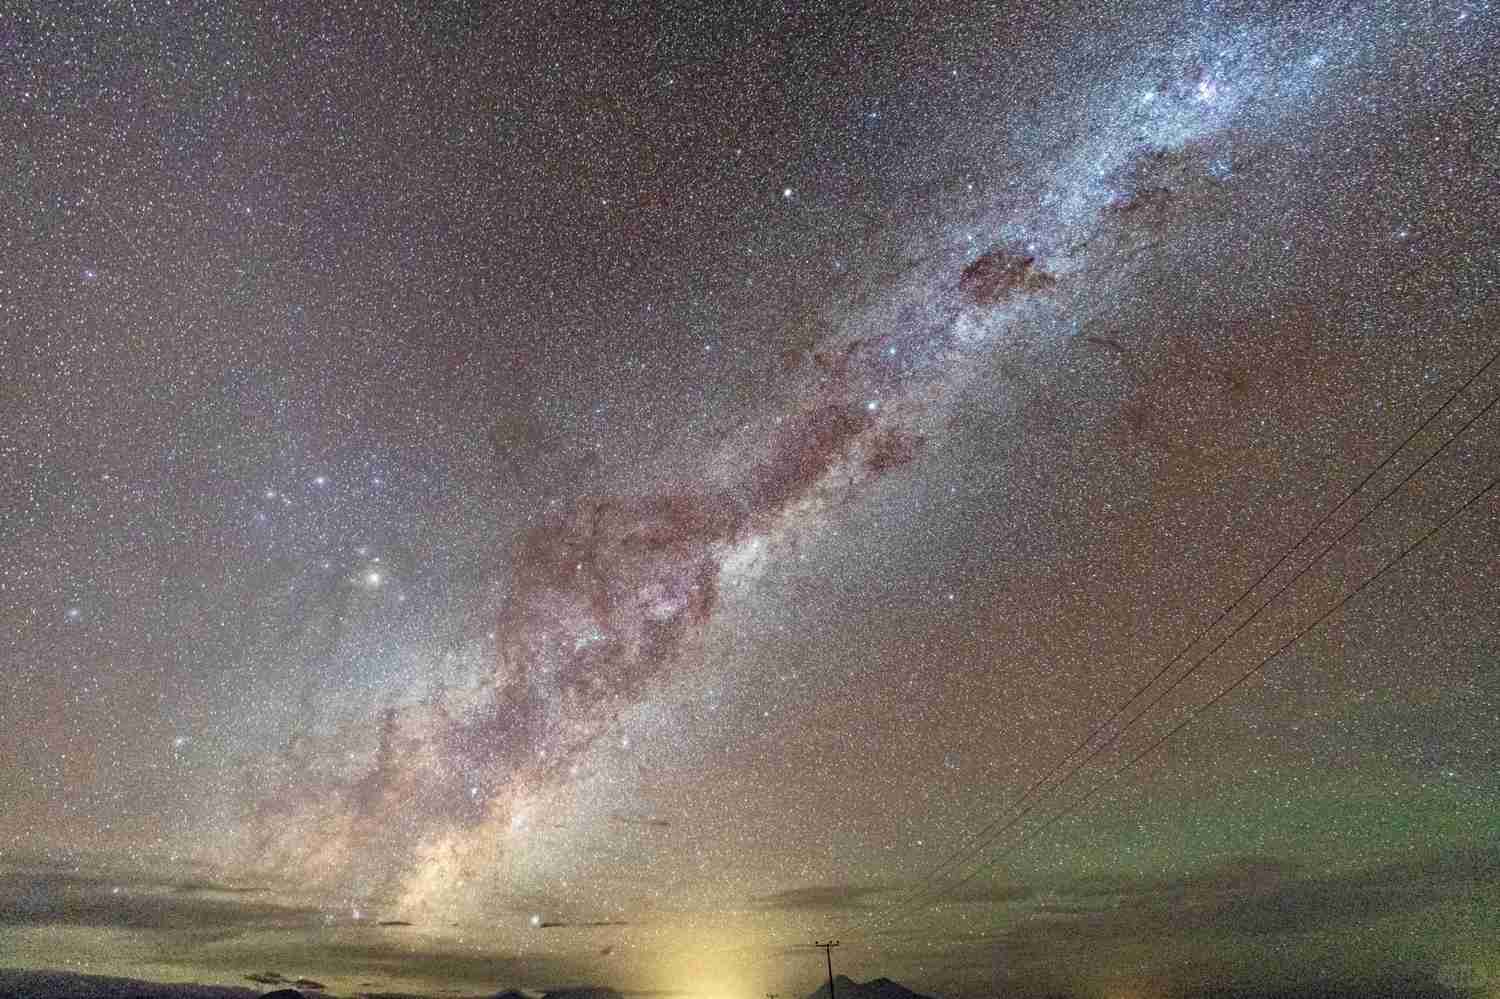
❗️This article uses the early morning of February 8, 2025, in Chile’s Atacama Desert as an example to introduce essential tips for viewing and photographing the Milky Way.
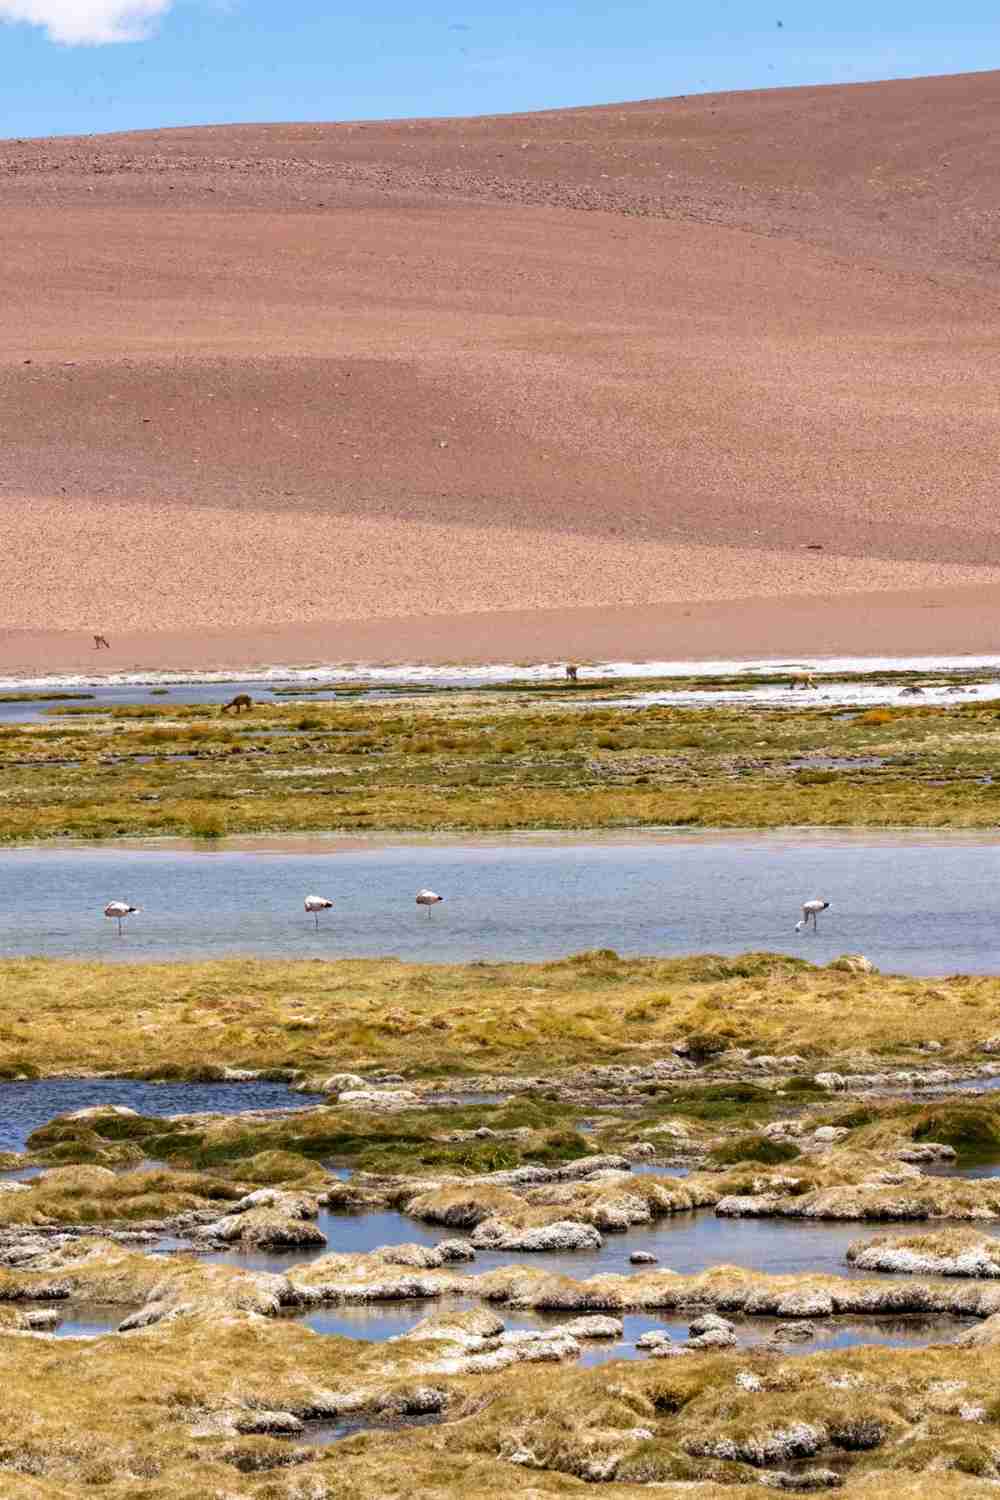
📢The Atacama Desert, primarily located in Chile, is renowned as the “driest place on Earth,” “the most Mars-like place on Earth,” and a region that has gone without rain for 90 years. It’s one of the best places on the planet for stargazing and serves as a base for numerous global astronomical telescopes and space exploration missions.
Interestingly, it’s also the world’s largest second-hand clothing dump.
After exploring the desert and the town of San Pedro de Atacama for three days, I found that while there are many stargazing tours available, cancellations are frequent. Based on my experience, it’s often better to go stargazing on your own, as you can find the best spots to avoid clouds and enjoy the view at your leisure.
1️⃣Conditions for stargazing and photographing the night sky
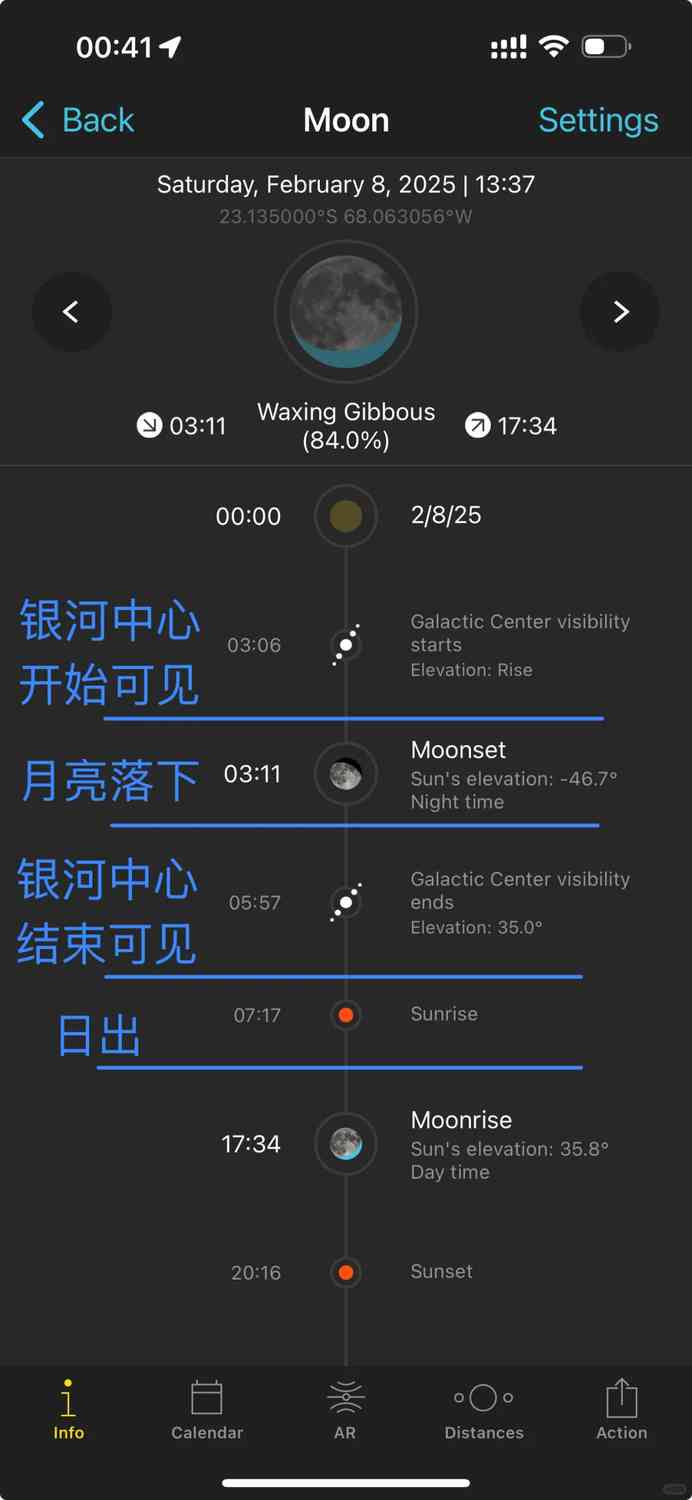
🌛No moon! Go out before the moon rises or after it sets (on that day, the moon set at 3:11 AM, so I went out at 2:30 AM).
🌌Ensure the Milky Way is above the horizon (on that day, the center of the Milky Way rose at 3:06 AM).
🌑The week before and after the new moon is the ideal time, but other times are also good as long as there’s no moonlight.
🌕Avoid the 2-3 days before and after the full moon (around the 15th of each lunar month), when the moon is almost always in the night sky.
☁️Minimal cloud cover; a few clouds are okay, but large clouds will obstruct your view.
◼️Choose a location with minimal light pollution.
🧥Dress warmly, as nights in the desert can be quite chilly.
2️⃣Practical apps and websites
– Check real-time cloud thickness at windy.com; dark yellow indicates the best conditions, while light white means visibility is slightly challenging.
– Assess light pollution at darksitefinder.com/map/; colorless circles indicate the best areas.
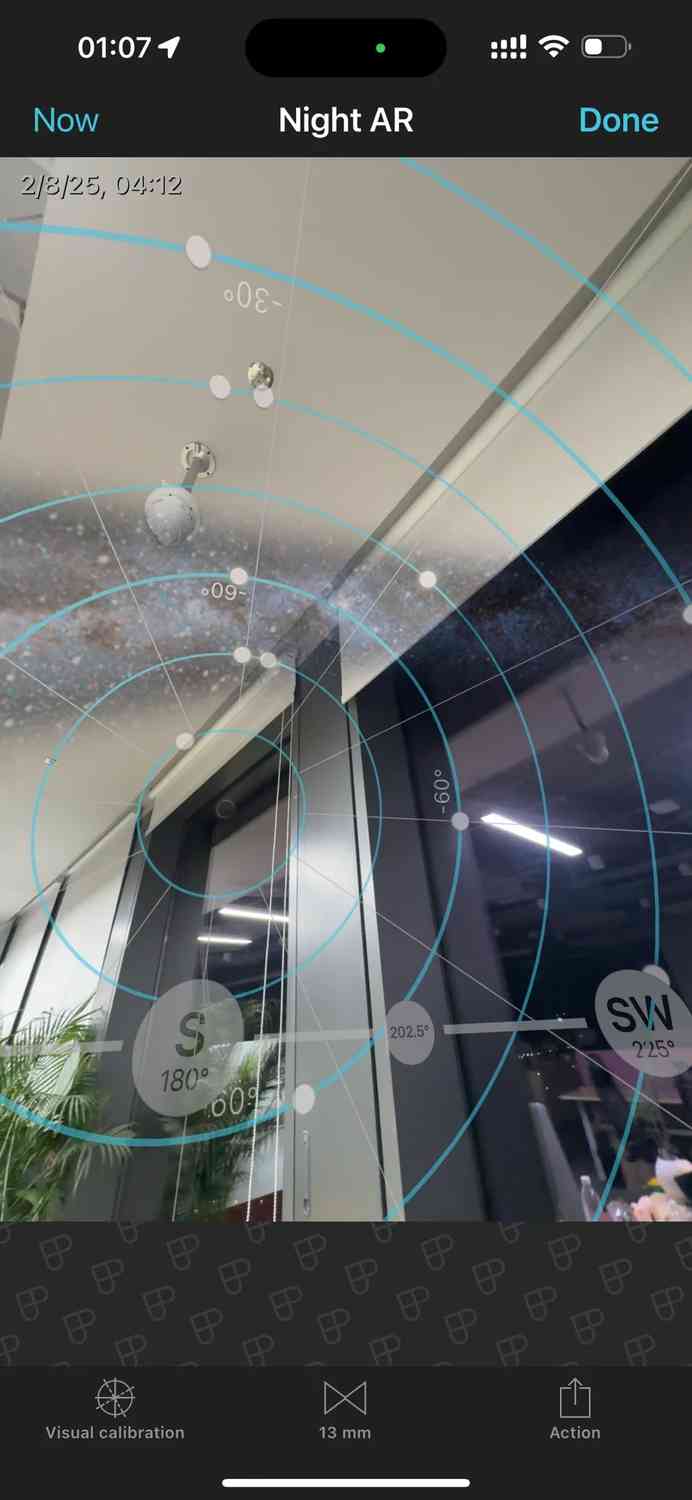
– App: PhotoPills, which includes the Planner function.
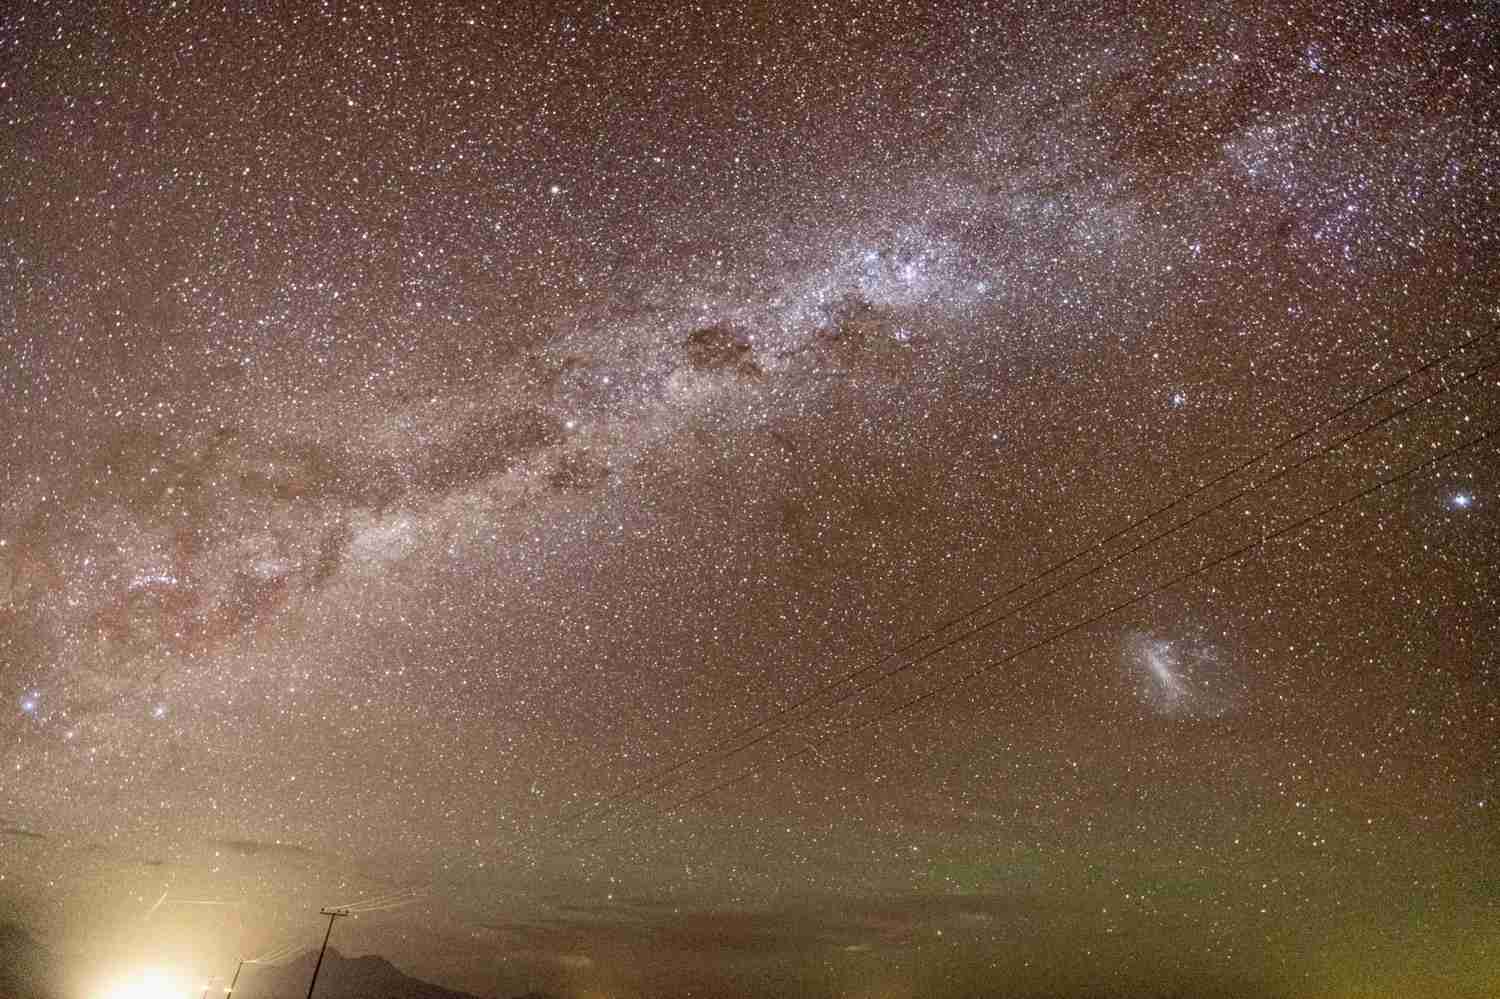
Use Night AR to point at the sky and see the direction of the Milky Way and planetary orbits (Figure 4). The Moon function helps you determine the time of moonset and the visibility of the Milky Way’s center (Figure 5). From this, ❗️it is concluded that the best viewing time for the Milky Way that night is between 3:11-5:57 AM.
3️⃣Camera parameters (experiment with different settings to find the best ones)
– A sturdy tripod is essential!
– Use a wide-angle lens (16-35mm may not capture the entire Milky Way).
– Turn off image stabilization.
– Set your camera to M mode, with the aperture as wide as possible (F2.8), and ISO between 3200-8000.
– Shutter speed should be around 20-25 seconds.
– Adjust white balance to 4000-5000K.
– Set the lens to manual focus, pull to the farthest, and first manually focus on the brightest star on the screen (edges should be sharp, not blurry), then adjust the focal length slightly.
4️⃣ Stargazing Locations
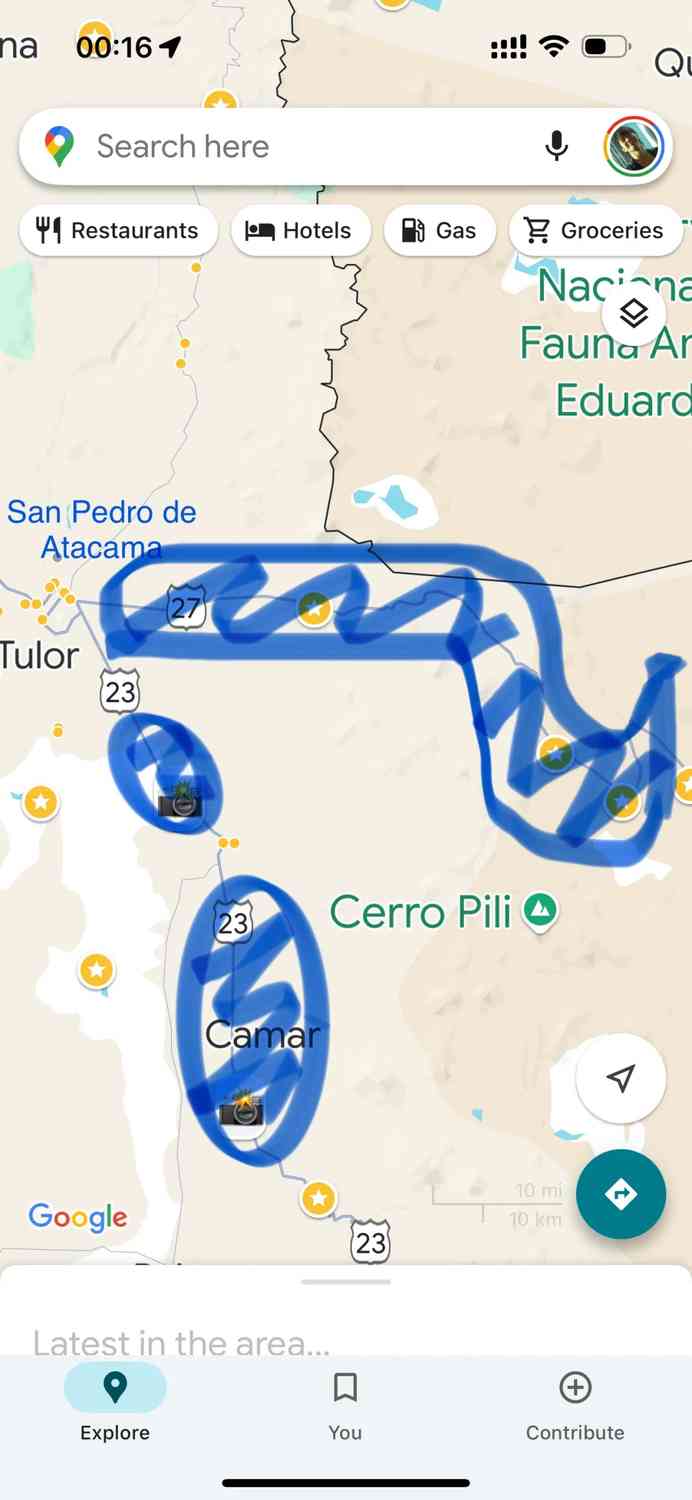
– The serene blue zones highlighted in Figure 6, located alongside Highways 23 and 27, are identified by darksitefinder.com as some of the least light-polluted areas. These spots offer a pristine night sky, perfect for stargazers seeking an undisturbed view of the cosmos.
For those who prefer a quick glance, a single, unstacked image is available, though stacking multiple images will reveal even more breathtaking details.