Comprehensive DIY Guide: Obtain a 10-Year Argentine Paper Visa Easily
Initially, I considered enlisting the help of an online travel agency to manage everything for me. However, upon inquiry, I discovered that the agency would charge 1680 RMB for notarization documents and over 1000 RMB for visa services. In total, just the service fees alone—excluding the costs from the notary office and the visa center—would exceed 3000 RMB.
Having previously applied for U.S., Schengen, and New Zealand visas on my own (with the exception of the Japanese visa, which cannot be submitted individually), I decided to take the DIY route once again.

Now that I have successfully obtained my visa, I am eager to share the entire process with you. This will help you understand the steps involved, avoid unnecessary complications, and save a significant amount of money on visa service fees, hahaha. I originally planned to write it all in one post, but due to the character limit, I will split it into two parts.
I. Choosing the Right Visa
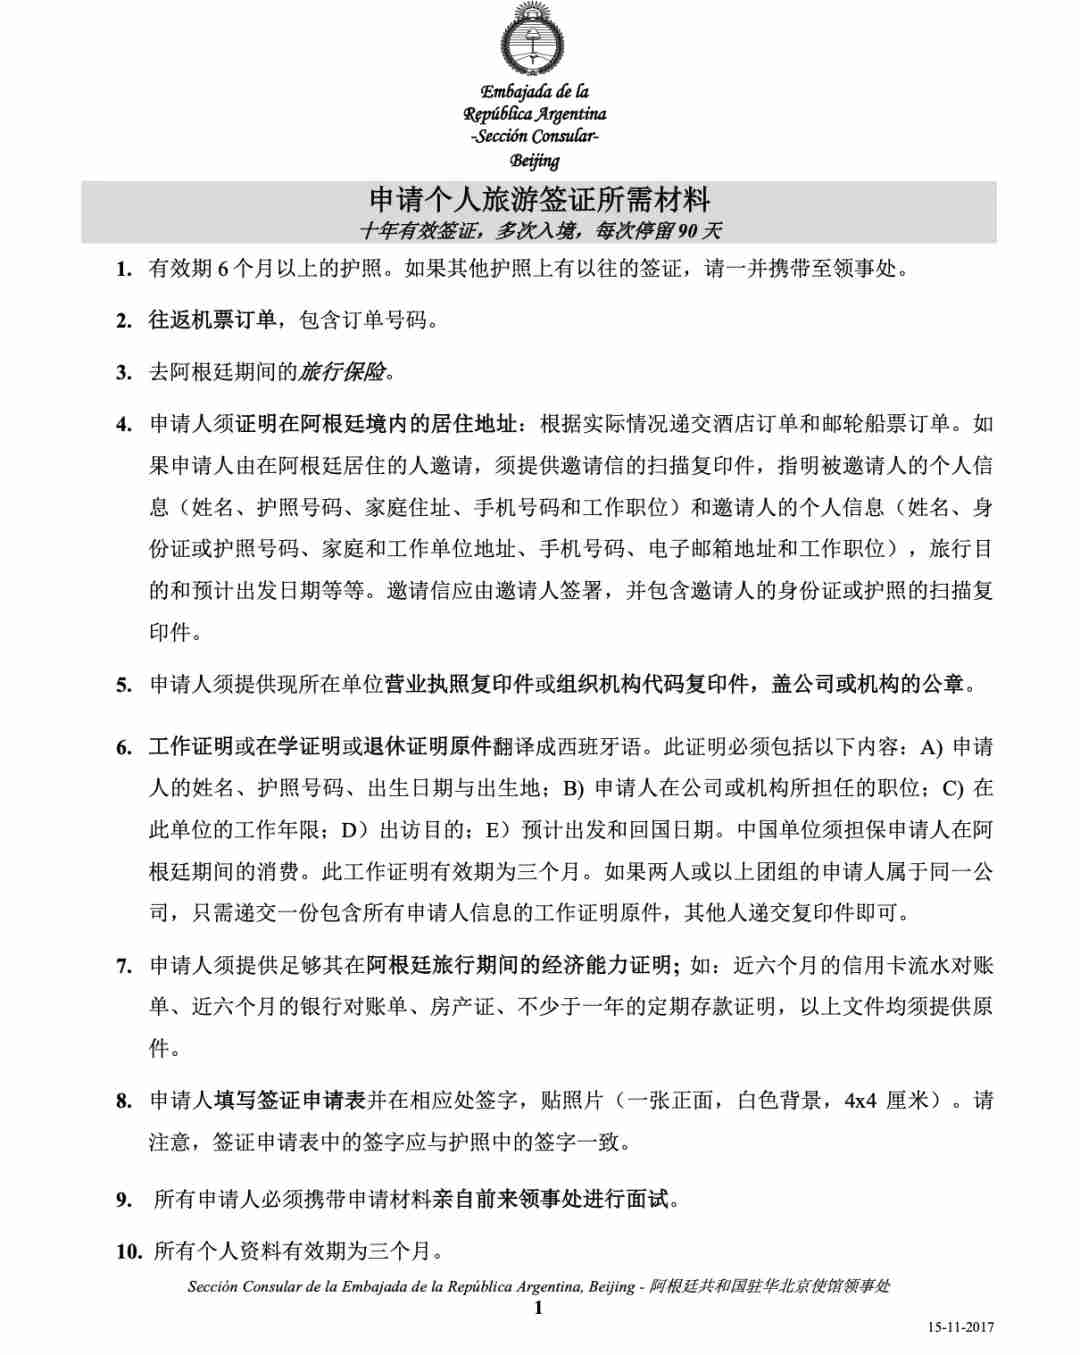
First, let’s discuss the types of visas available: there is a 90-day valid e-visa and a 10-year paper visa.
If you already have a U.S. visa, you can directly apply for an e-visa, with an application fee of 400 USD. It is recommended to start the application process at least one month in advance, as it currently takes around 20 working days to process.
Although I also have a U.S. visa, I opted for the 10-year paper visa because it only costs 150 USD, plus approximately 500 RMB for notarization and authentication, making it a more cost-effective option.
II. Preparing the Necessary Documents
Once you’ve decided whether to apply for an e-visa or a paper visa, the next step is to gather the required documents. The most challenging part of this process is the notarization and Apostille certification.
1. Notarization and Apostille:
Here are the documents needed for notarization and Apostille: employment verification, passport, employment contract, tax records, and ID card.
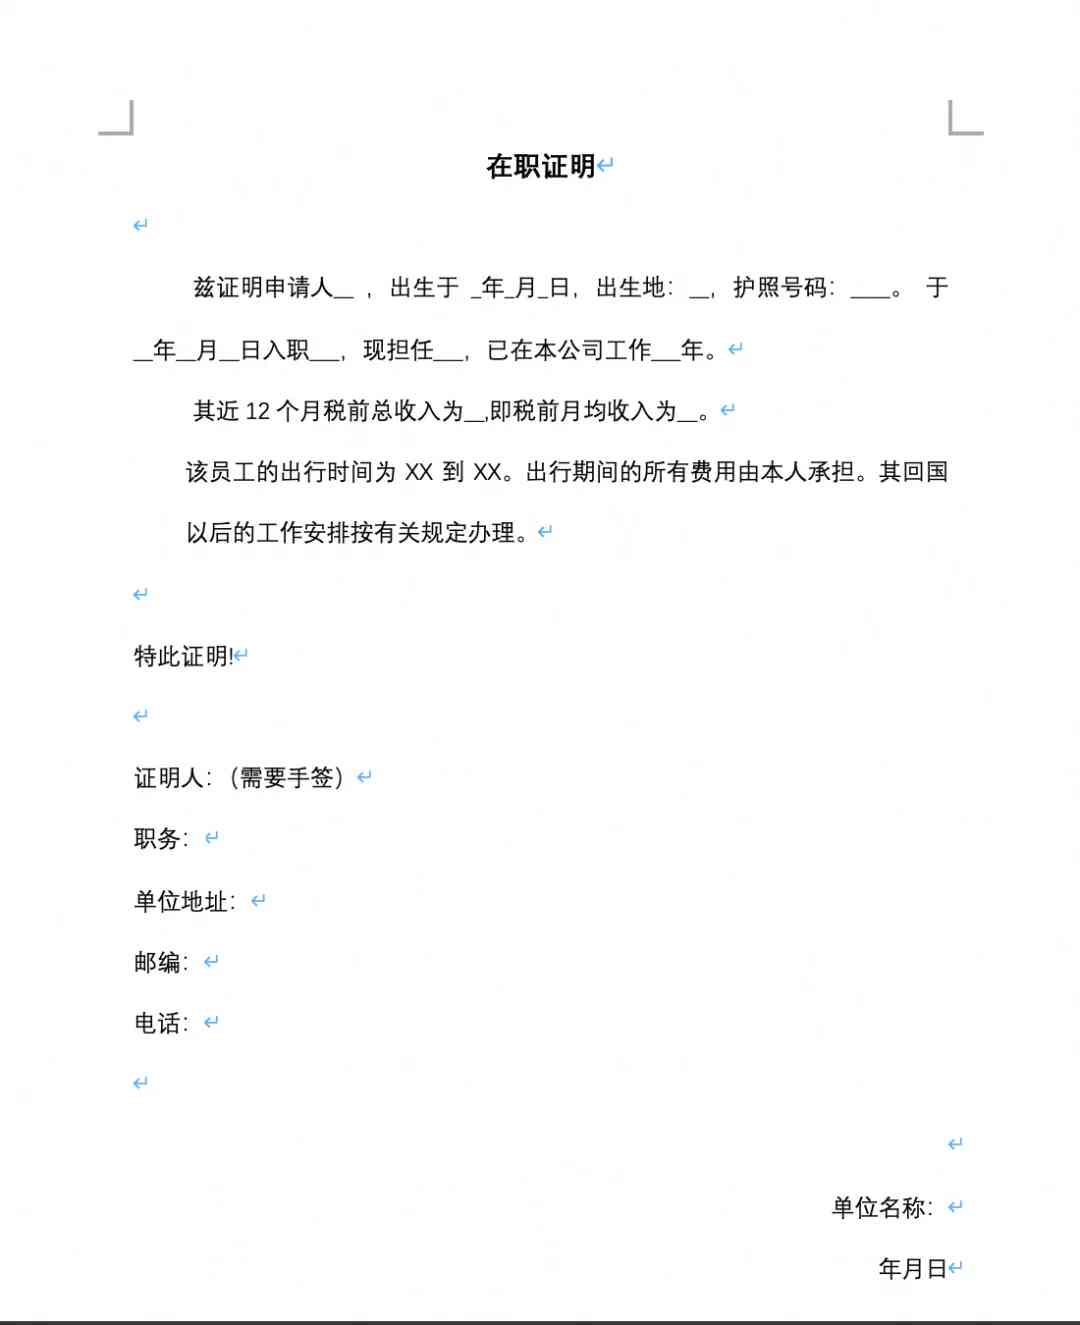
1) Employment Verification: I used a template, which I will include in the pictures, and it contains all the necessary fields. Make sure to include key details such as the start date, years of employment, and the departure and return dates.
2) Employment Contract: Include all contract documents from the time of employment to the present, including any renewed contracts.
3) Tax Records: I printed out the previous year’s records, as I used the annual income information on my employment verification.
After preparing these documents, head to the notary office and inform them that the documents need to be translated into Spanish. We visited the Shanghai Oriental Notary Office, where the service was excellent. They can also handle the Apostille certification, with a processing fee of 100 RMB and a certification fee of 50 RMB.
We had them take care of everything, and after about 10 working days, the certified documents were delivered right to our doorstep, saving us the hassle of multiple trips to the notary office and the certification authority.

