Seamless Travel Experience: Smooth Entry and Exit at Jakarta Airport
Indonesian visas can be obtained through visa on arrival or an advance e-visa.
For this trip to Jakarta, Indonesia, I chose the advance e-visa. Compared to the 1-hour queue for entry in Ho Chi Minh, I must say that choosing the e-visa was a wise decision!
[Processing of E-Visa]
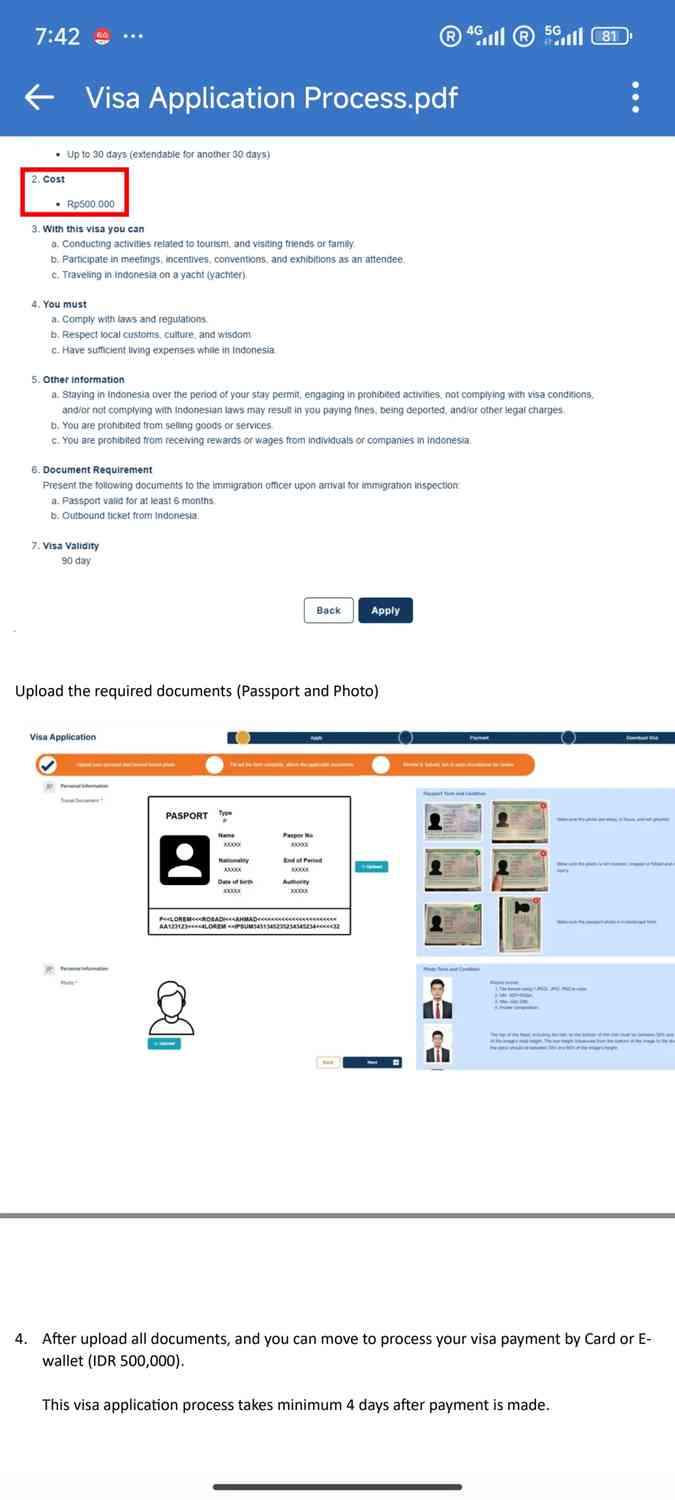
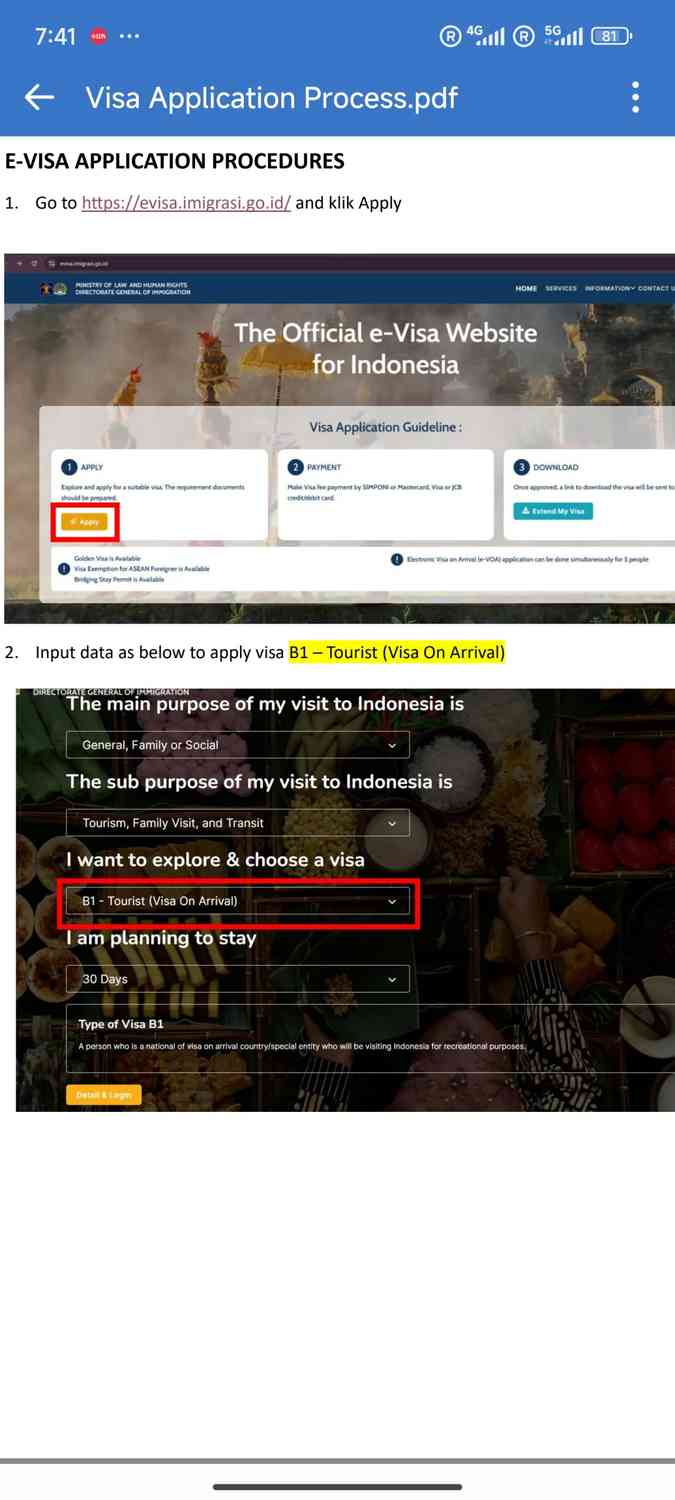
1. Apply directly through the Indonesian Immigration website, with a fee of 500,000 IDR (approximately 220 RMB)
https://evisa.imigrasi.go.id
The registration process is shown in P2, P3. You need to prepare a photo of the first page of your passport and a 2-inch (35x45cm) white background electronic photo.
**There is a risk of not passing the review if you apply by yourself, so it’s not recommended when time is tight.

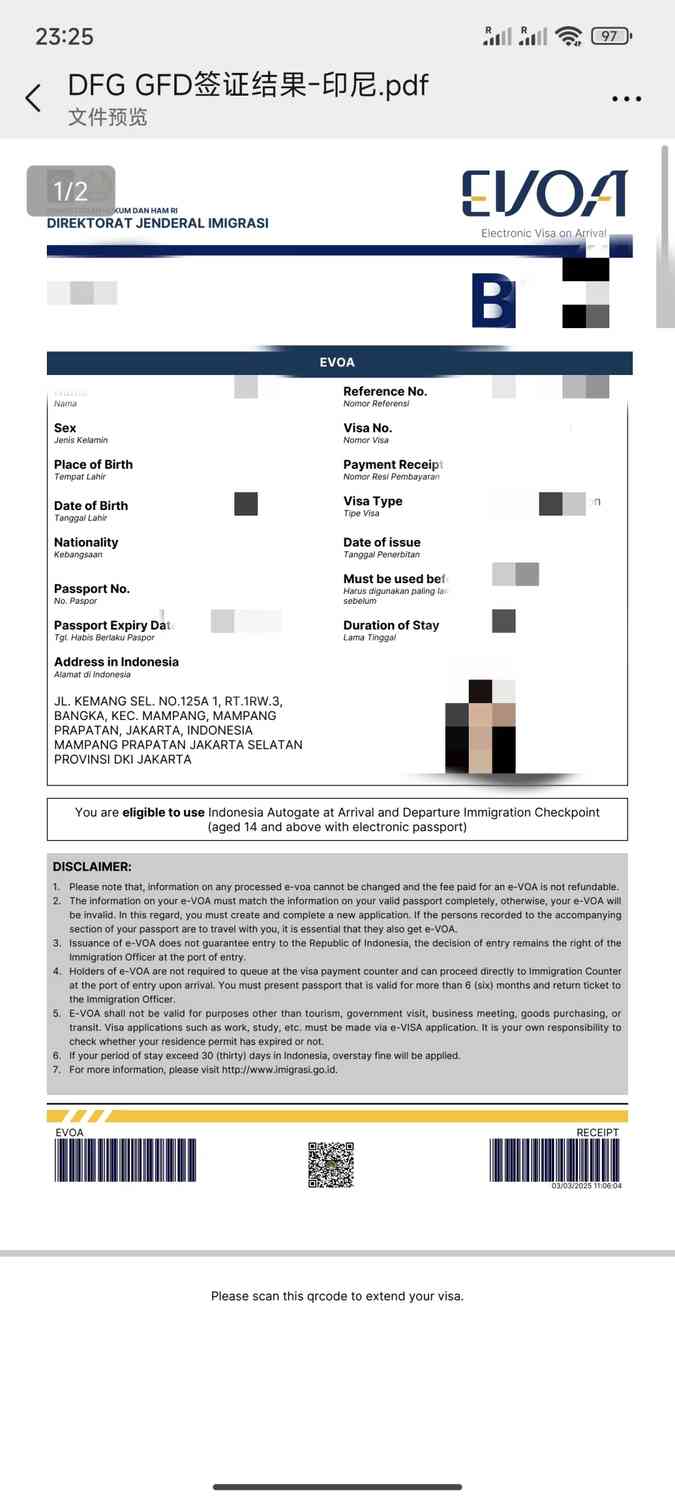
2. Apply through Taobao.
You only need to provide the first page of your passport and a 2-inch (35x45cm) white background electronic photo,
with fees ranging from 200-250 RMB. The advantage is a 100% issuance rate, and you can choose the issuance date, with the fastest being 1 day.
The e-visa will look like P4, which you can print out for reference.
Of course, you can also opt for a visa on arrival after landing in Indonesia, but this requires queuing and additional time for various procedures. The cost seems to be 500,000 IDR as well.
[Entry]
This time, I entered through Soekarno-Hatta Airport in Jakarta.
No entry card is required, and they are not distributed on the plane.
After disembarking, scan the entry declaration code (P5) (the other one is the health code, which is no longer required now). After filling in the information, a QR code, which is the entry declaration code, will appear. You can take a screenshot and save it, or click “download” to save it for future use.
Walk all the way to the customs inspection area, where there is a row of machines on the right for e-visa clearance. With an e-visa, you can go through the machine (if it’s a visa on arrival, you have to go to the left for manual processing). There were very few people at the time, so there was no need to queue.
After scanning the passport, you can go straight through. You do not need to show the QR entry code here. The whole process took about 30 seconds [smiling emoji]
(The e-visa also avoids the question of whether to give a tip, although now it is clearly stated that tipping is prohibited for visa on arrival)
After collecting your luggage, there will be several staff counters with scanners to scan the entry declaration code. Show the saved QR code at this point. Then you can leave directly.
**After exiting the airport, you can choose Grab or the local Indonesian Gojek for a taxi, which is both convenient and cheap!
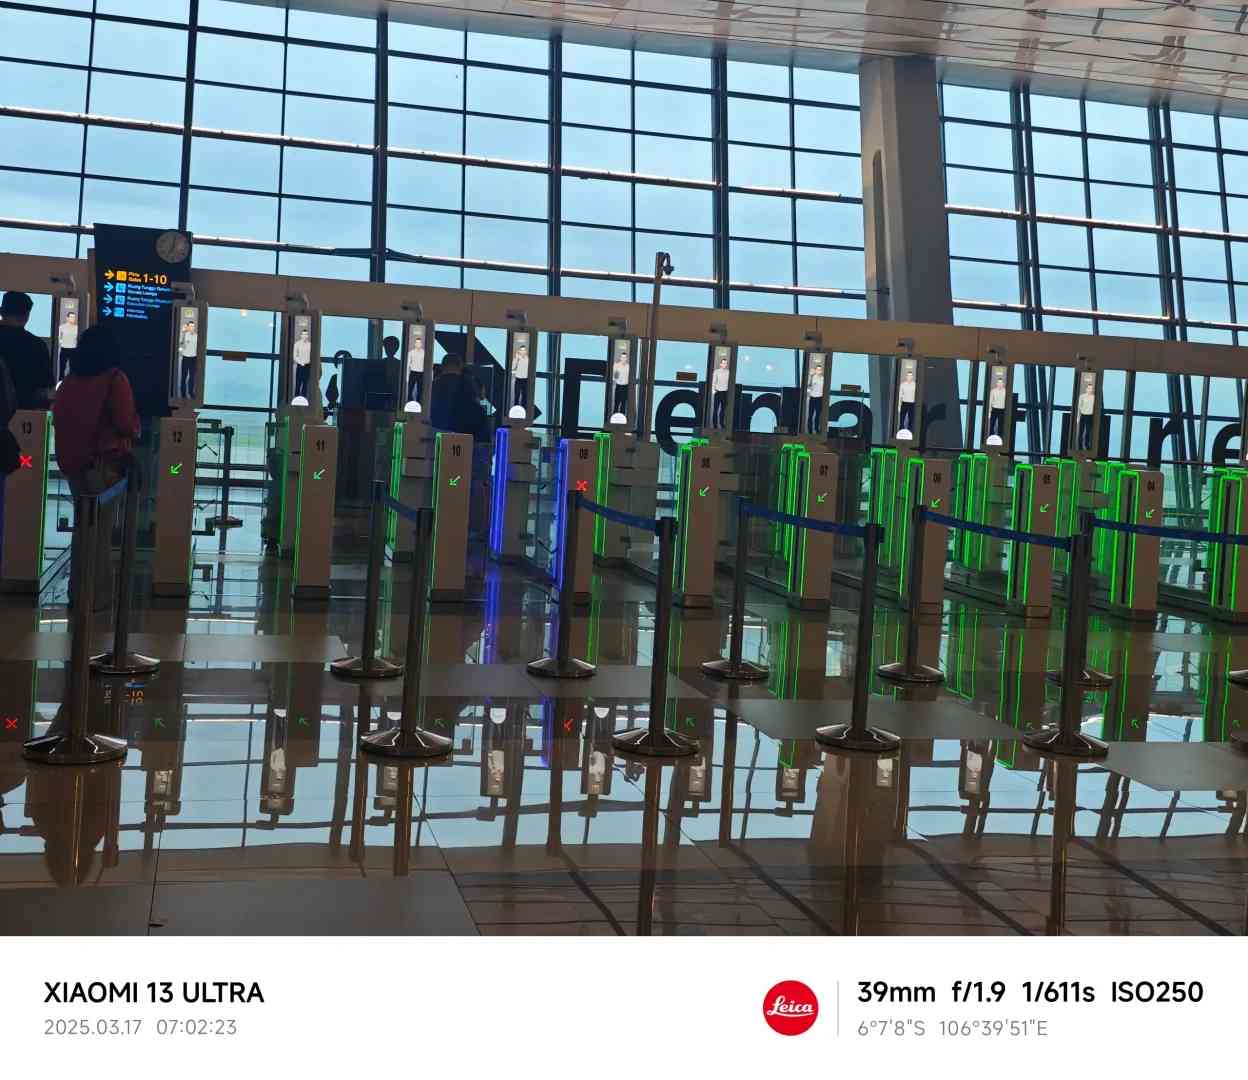
After passing through security, take a few steps and you’ll find a row of machines (P6). Whether you have an e-visa or a regular visa on arrival, these machines will guide you through the exit process.
Once you enter the first door, follow the instructions to place the first page of your passport firmly against the scanner. Wait for the prompt to remove your passport, then wait for the door to open, allowing you to proceed.
*Note: Before entering the first door, ensure your carry-on luggage is behind you, and it’s best to remove any shoulder bags and keep them behind you as well. Otherwise, the machine might misinterpret it as two people, leading to a failed verification. If the machine indicates a failure, try a few more times. In my experience, I switched to three different machines and attempted 4-5 times before succeeding. The entire process took about 3 minutes.
Overall, the time spent entering and exiting Jakarta is remarkably brief. Additionally, the exit security check was quite efficient, with very few people in line. Arriving at the airport about 2 hours in advance should be more than sufficient.

