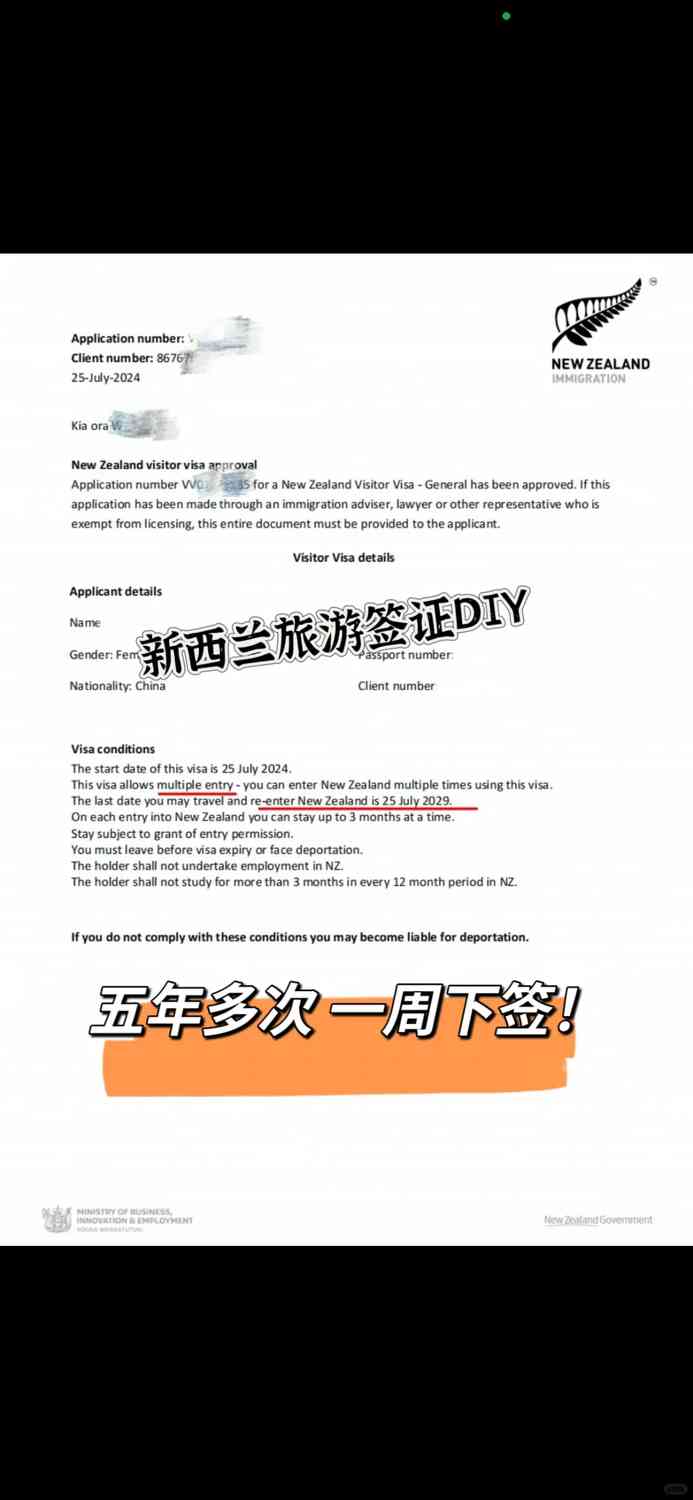
New Zealand 🇳🇿 DIY Visa Guide: Fast 1-Week Processing & 5-Year Multiple Entry Tips
Given that the New Zealand visa can be applied for directly on the official website, and to avoid any unreliable agents, I decided to take the process into my own hands 🤓. The steps are straightforward; with thorough preparation, you should breeze through it without a hitch.
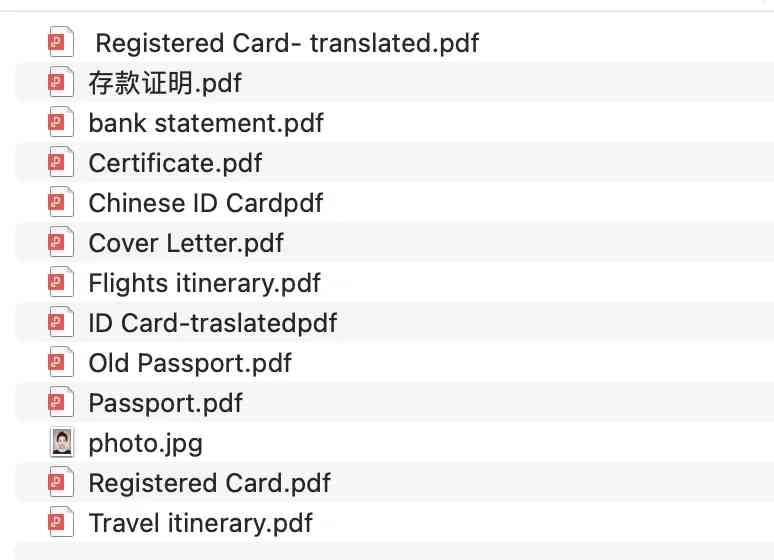
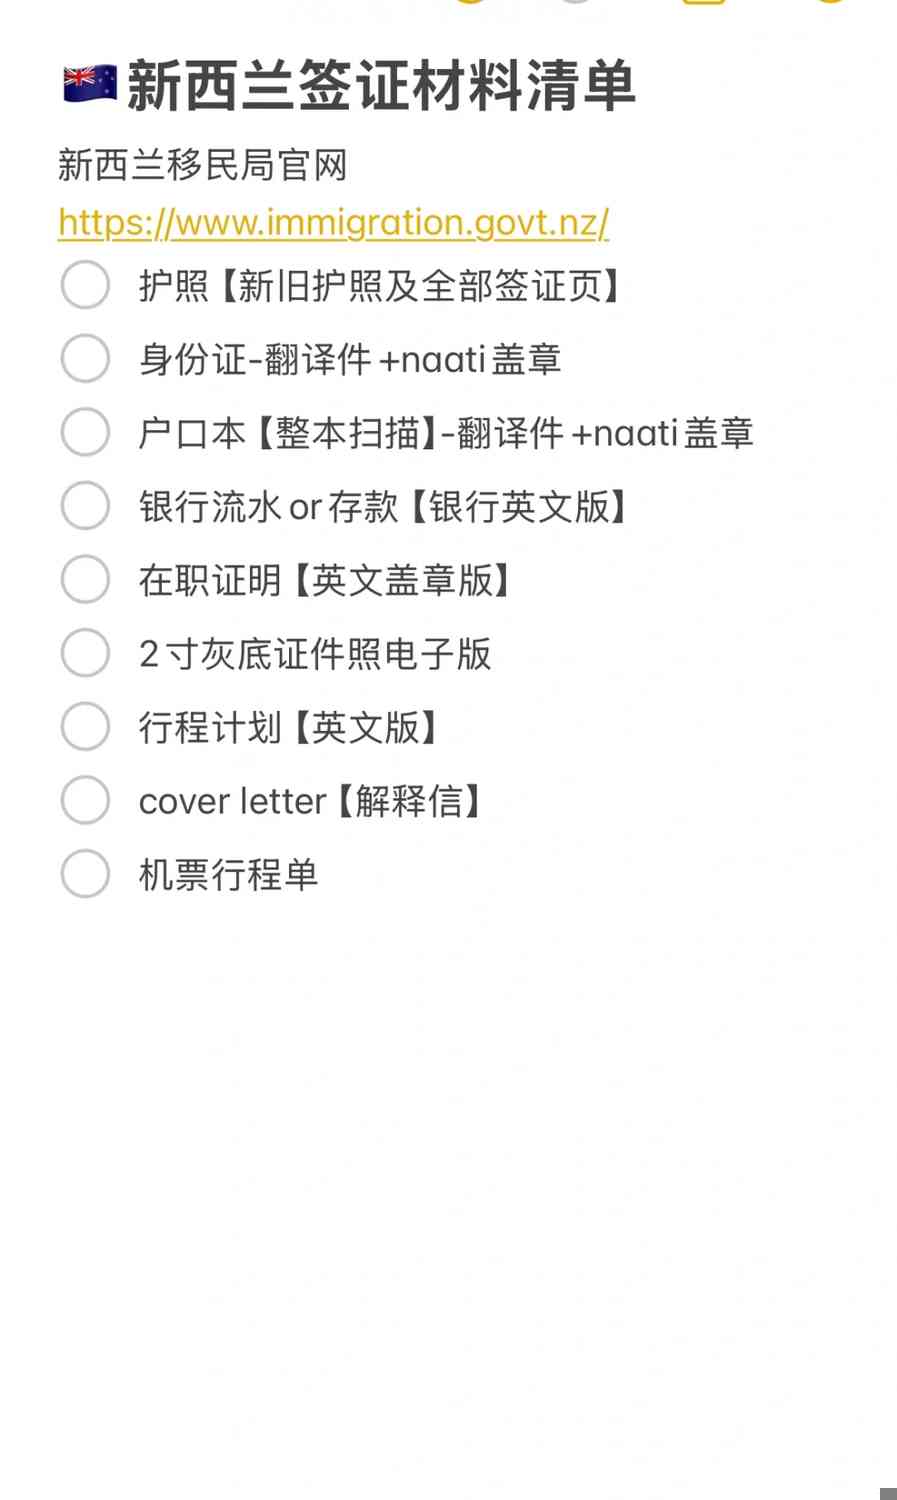
📝 **Required Materials:**
1️⃣ Passport [both new and old, including all visa pages]
2️⃣ ID card – translated document + NAATI stamp
3️⃣ Household registration book [full scan] – translated document + NAATI certification
4️⃣ Bank statement or deposit [in English]
5️⃣ Employment verification [stamped in English]
6️⃣ 2-inch gray background digital photo
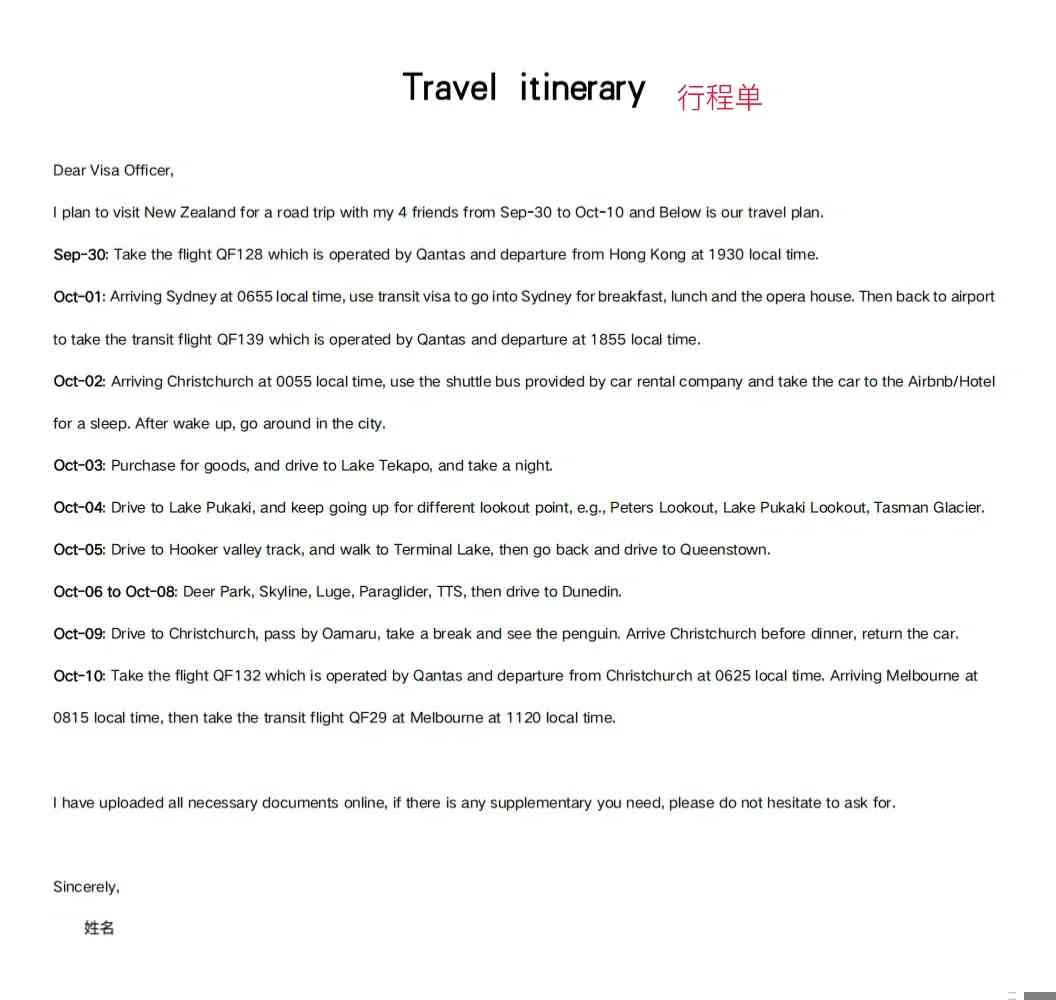
7️⃣ Travel itinerary [in English]
8️⃣ Cover letter [explanatory letter]
9️⃣ Flight itinerary
👉 **Steps:**
🌐 **Website:** https://www.immigration.govt.nz/
1️⃣ Register a RealMe account on the New Zealand visa official website.
2️⃣ Log in to the website and select “General Visitor Visa” for tourist visas.
3️⃣ Fill in the required information and upload the materials in sequence (PDF format ⚠️).
4️⃣ Complete the payment and wait for the result 🍀.
🌟 **Tips:**
❗️ Ensure that the translations of your household registration book and ID card have NAATI certification. When looking for translation services, it’s wise to compare prices. Searching for “New Zealand visa translation” can lead to expensive options (over $200 per page), but searching for “NAATI translation” can help you find more affordable choices (around $20 per page).

❗️ You can obtain an English bank statement directly from your bank, eliminating the need for translation.
❕ For the travel itinerary and cover letter, refer to the examples provided in figures 4/5 [😊].
Happy travels!

