Unmanned Filming at Bromo Volcano: Behind the Scenes vs. Ground Reality
Despite having a high fever, I didn’t find the trip too exhausting. Today, I’ll walk you through the best camera positions and essential precautions for your visit.
⚠️ Precautions:
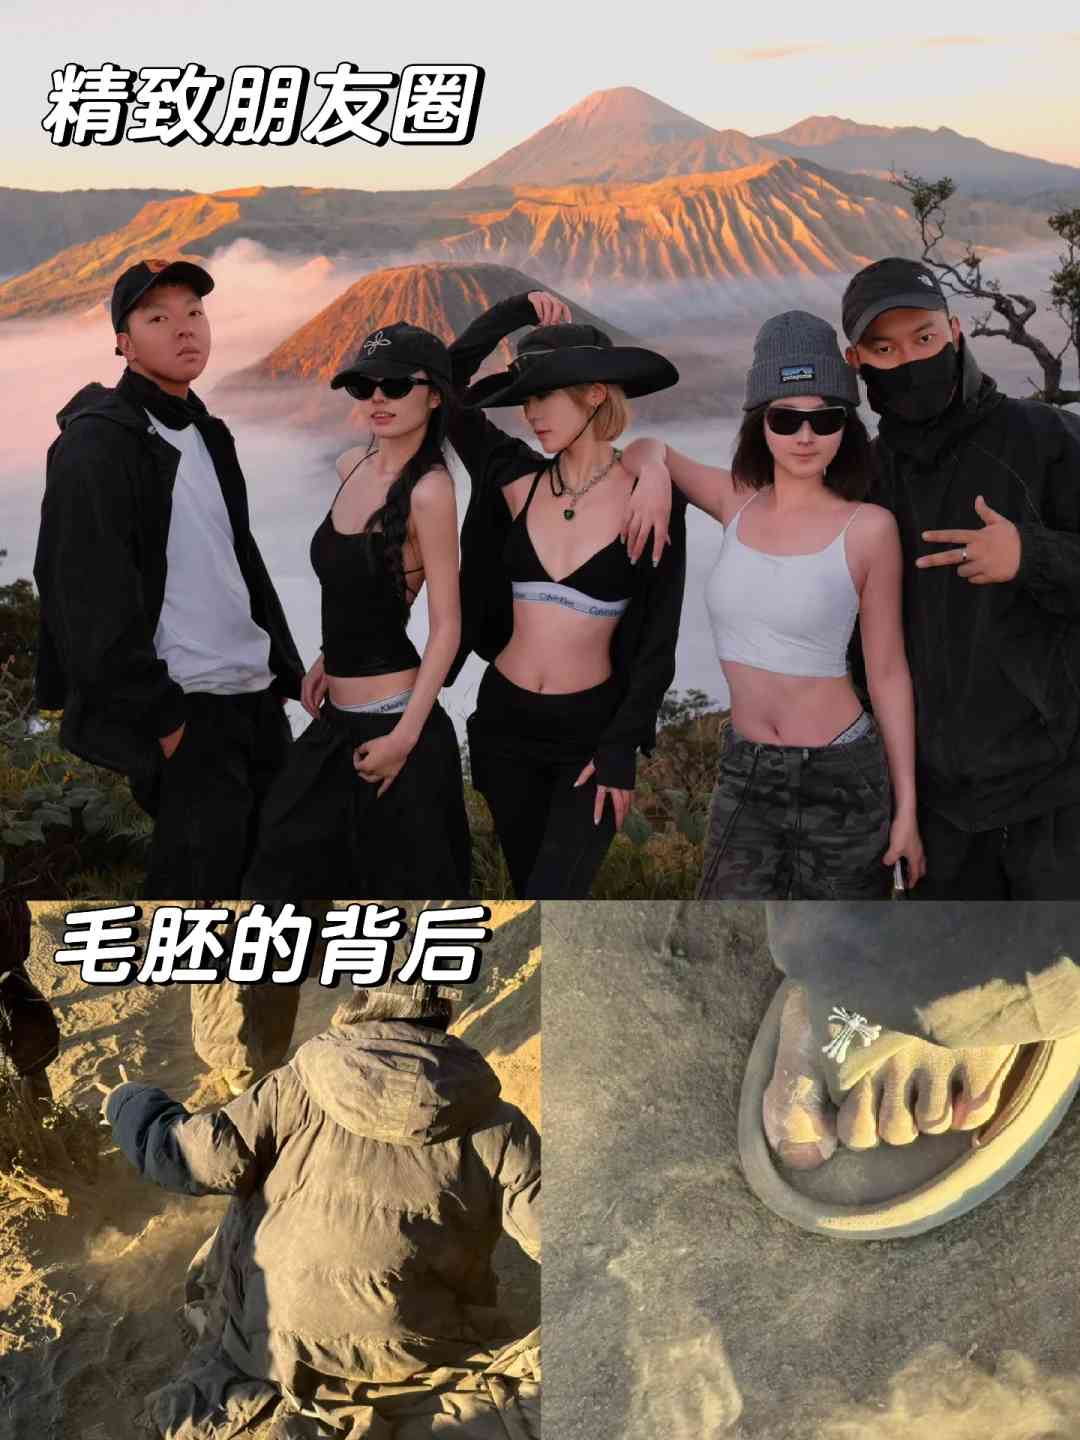
1️⃣ **Clothing Tips**: The volcano can get extremely cold, especially at dawn. However, there’s no need to pack bulky clothes from home. Around Bromo, you can easily rent warm gear for about 20,000 Indonesian Rupiah (around 12 RMB). This is particularly useful because volcanic ash can be quite heavy and messy, and you won’t want your own clothes and shoes to get dirty.
You can see this in the photos later.
2️⃣ **Timing and Transportation**: Make sure to ask your guide to start early. The ascent to Bromo is by jeep, and since there’s no designated parking area, arriving early means you can park closer to the entrance, reducing the walking distance.
There aren’t many other things to worry about; it’s fairly straightforward. Now, let’s dive into the best camera positions.
📷 **Camera Positions**:
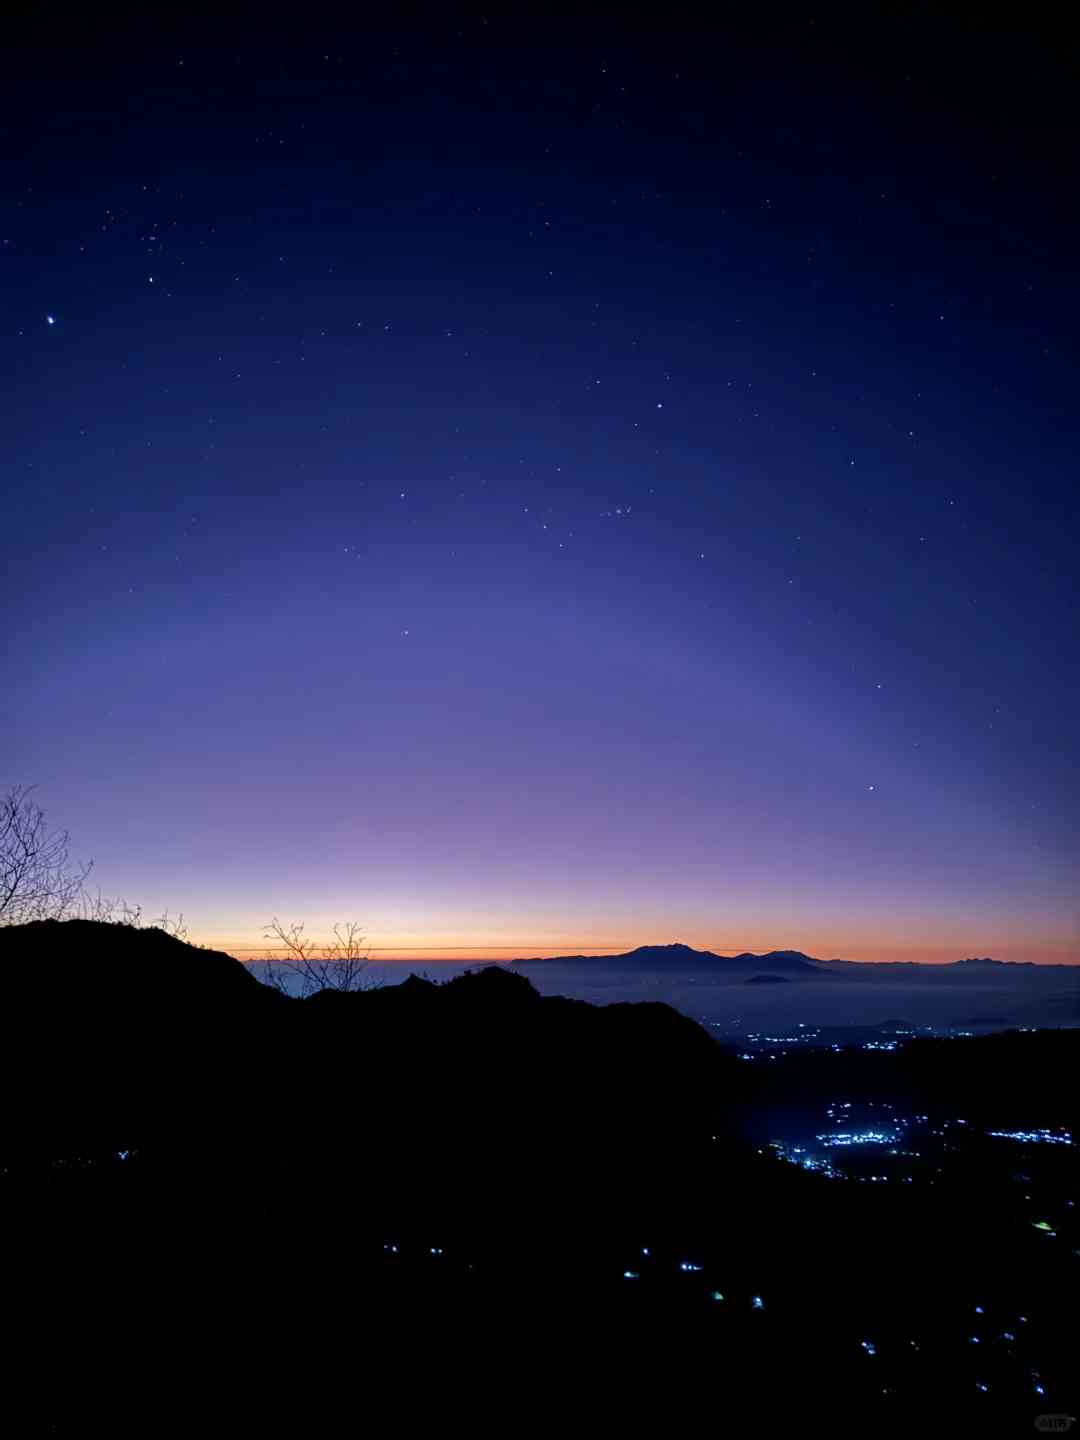
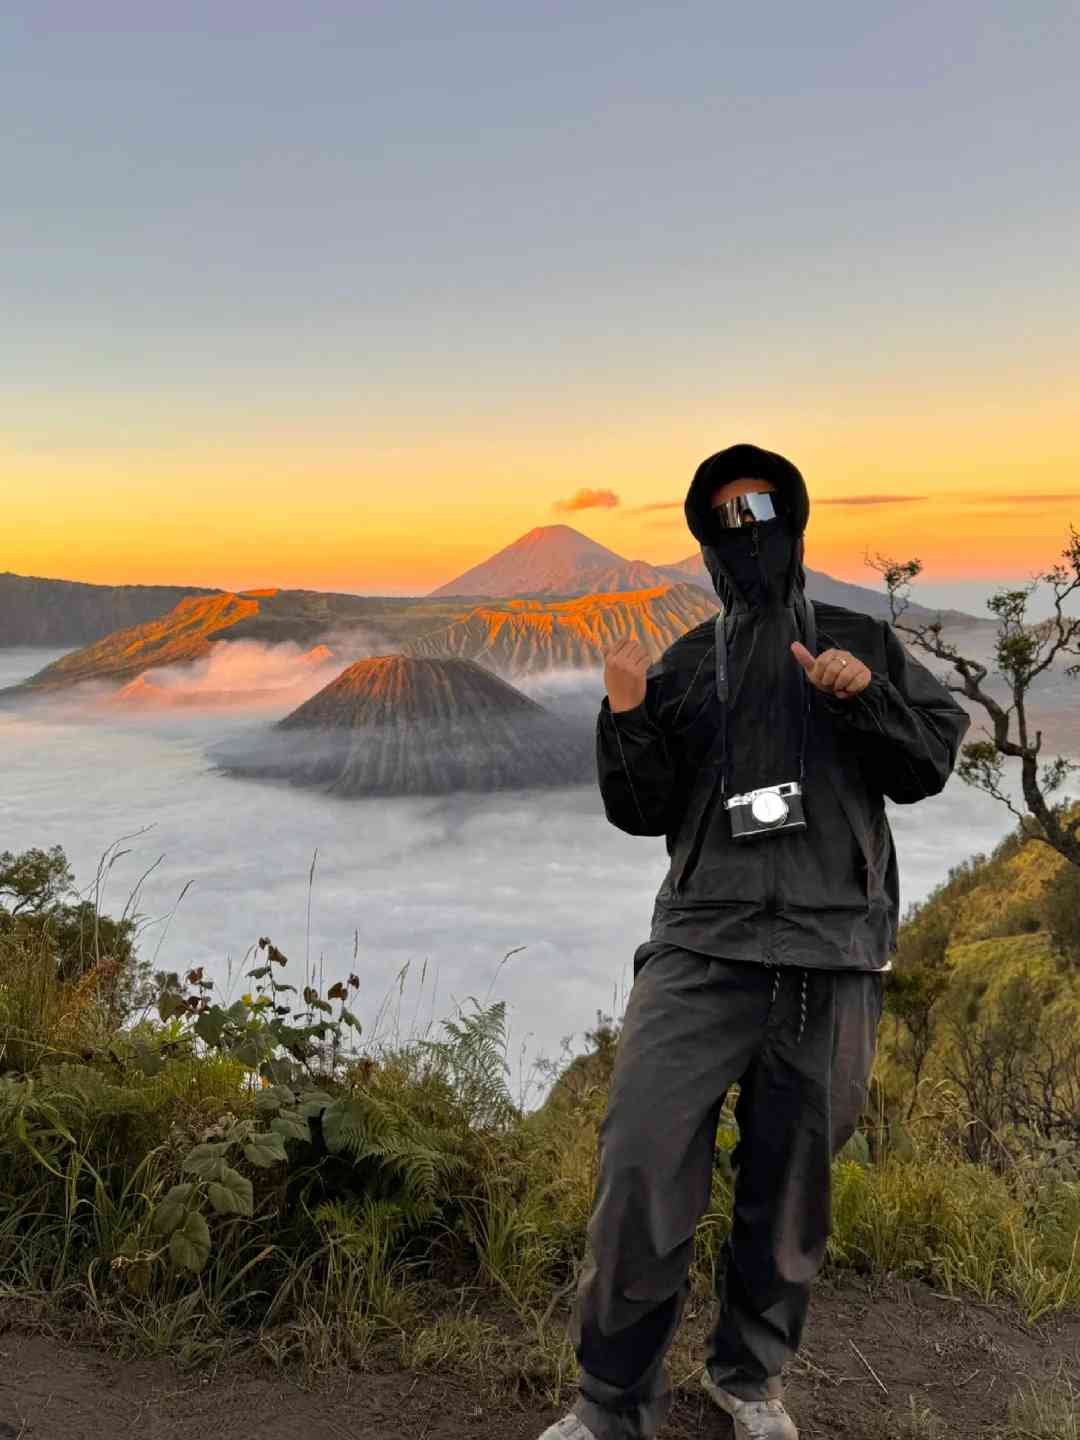
1️⃣ **Sunrise Spot**: After climbing, head straight to the sunrise viewing point. The view is breathtaking, and if you’re lucky, you might even capture some stars with your phone.
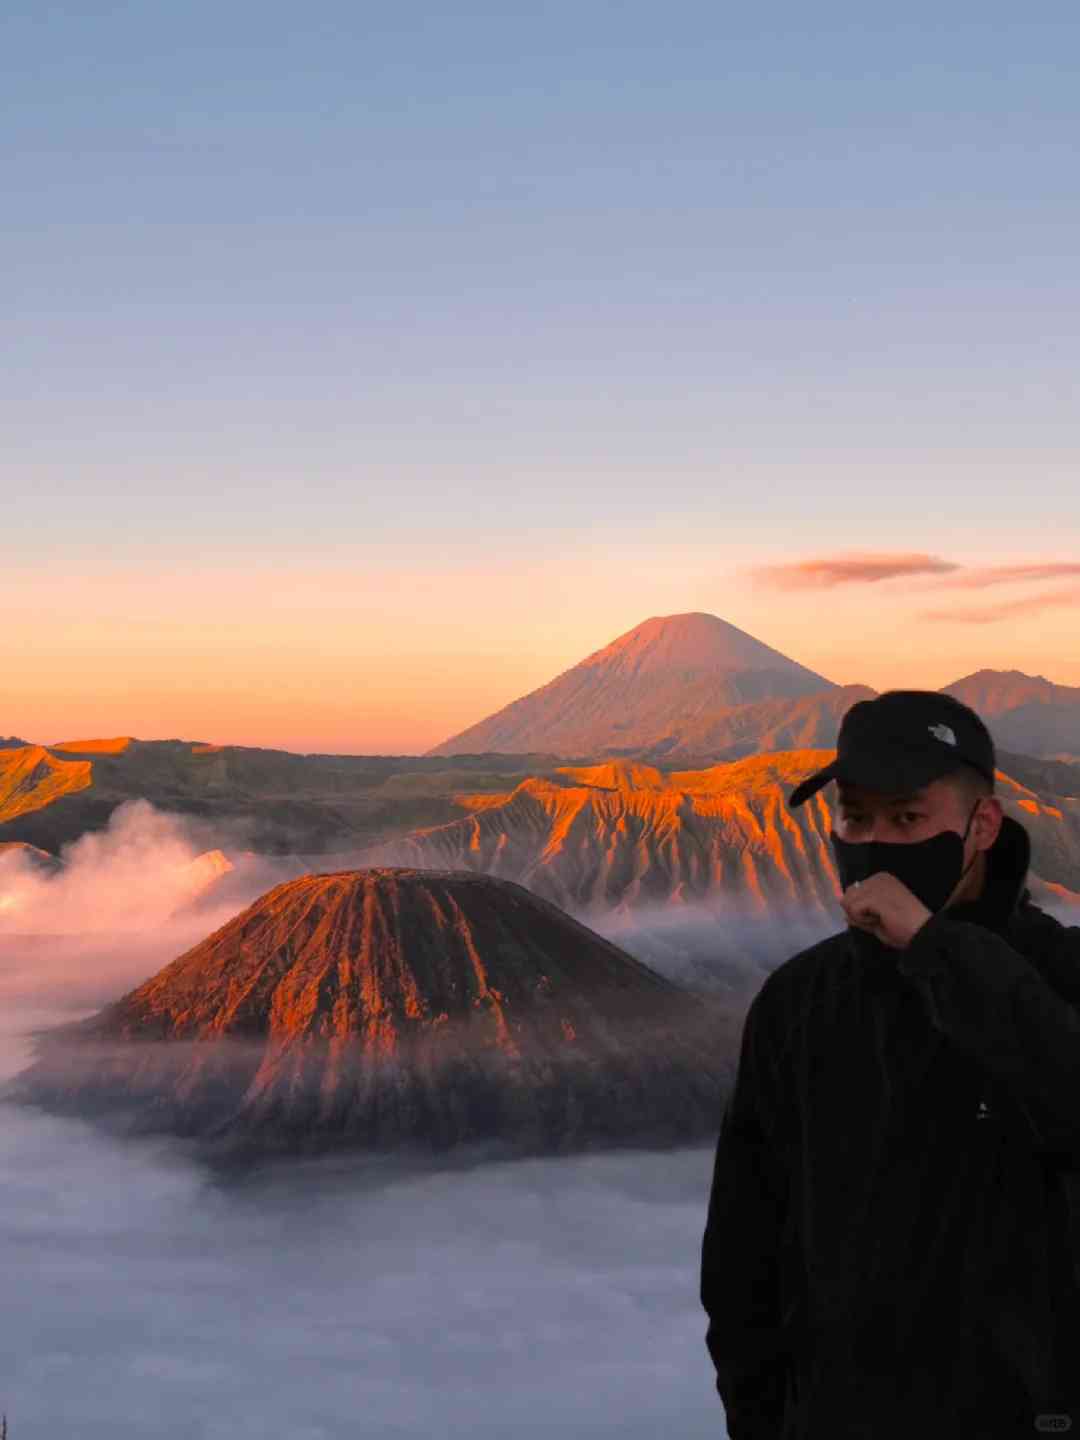
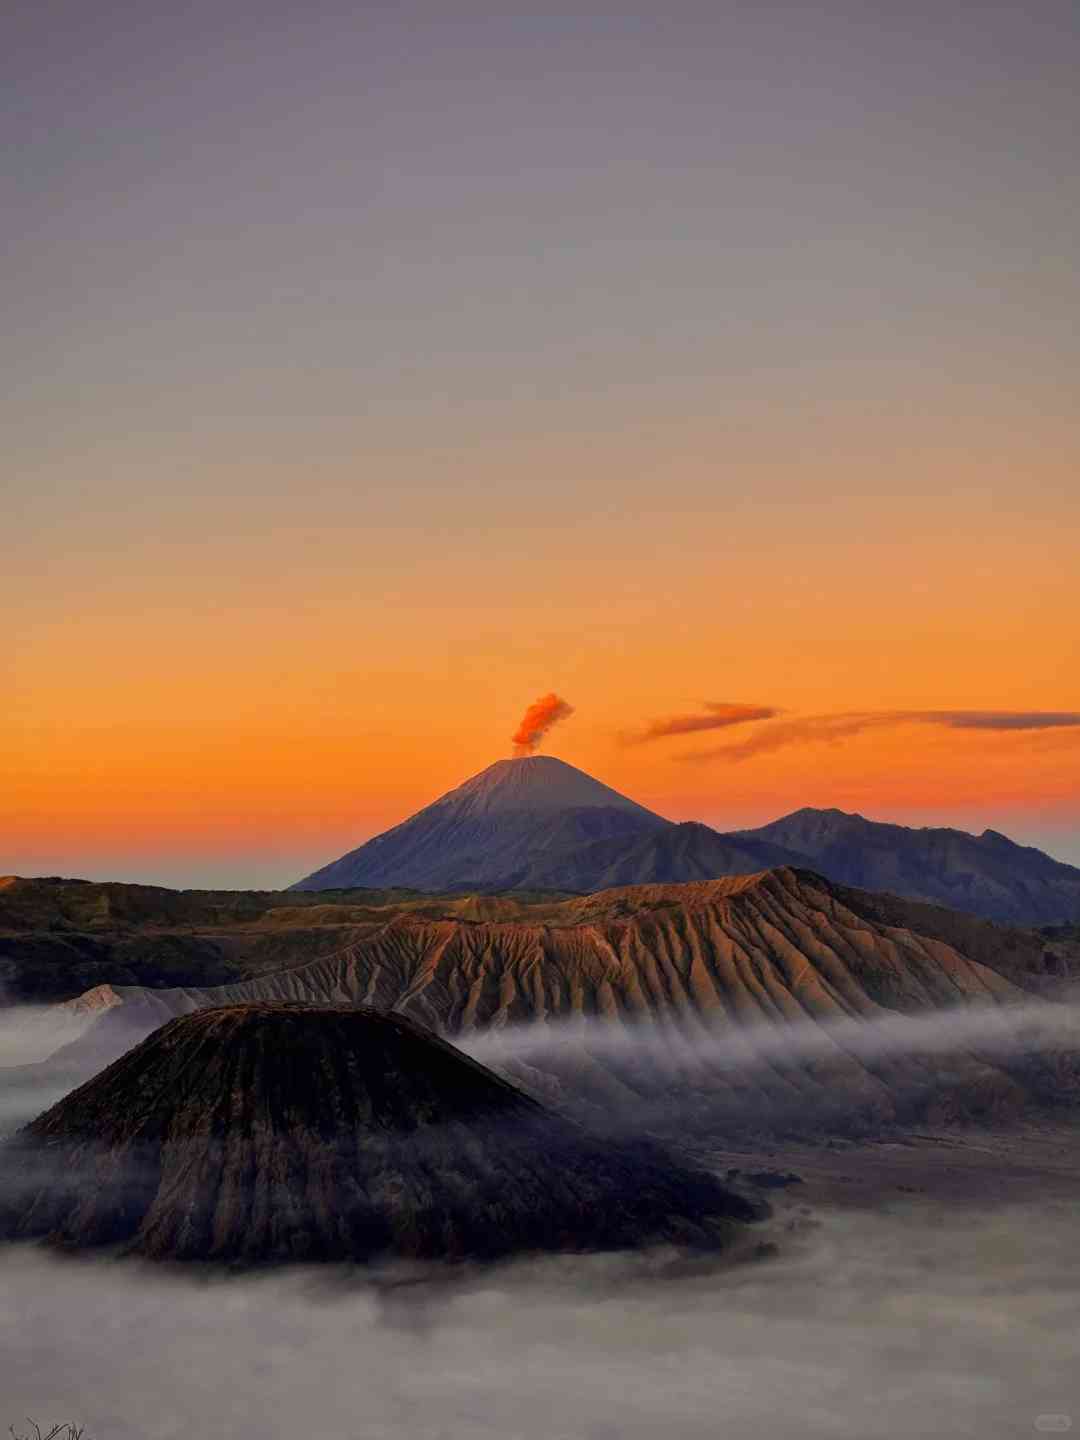
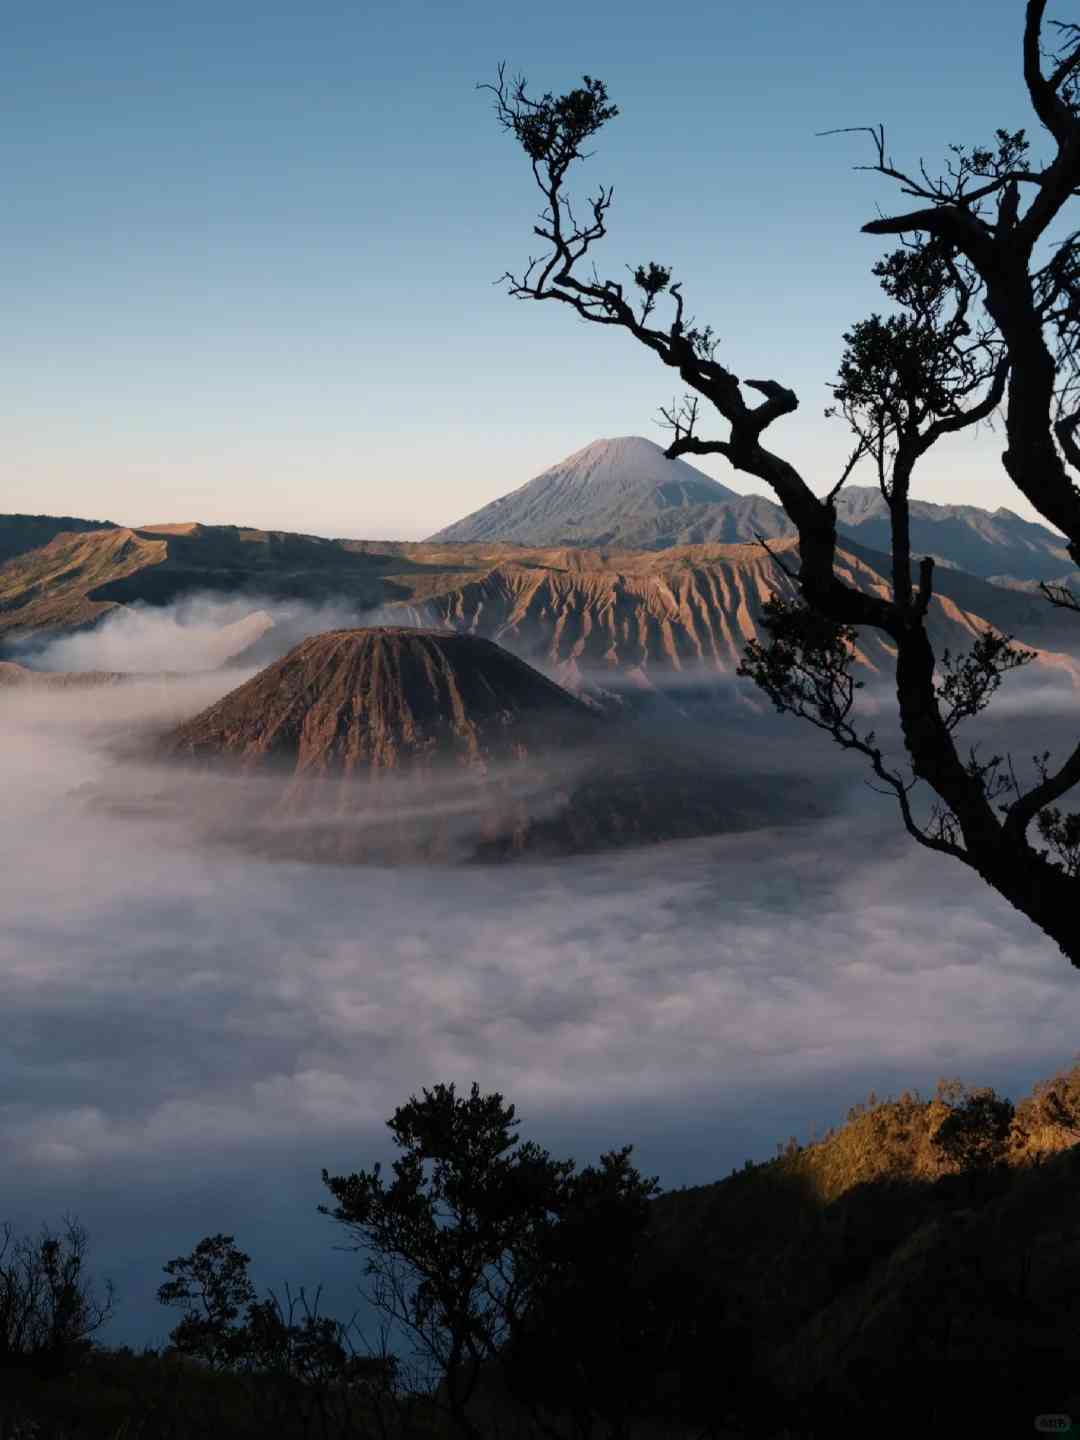
2️⃣ **Volcano Viewpoint**: Once the sun is up, continue climbing without stopping. When you reach the top, descend a bit on the other side.
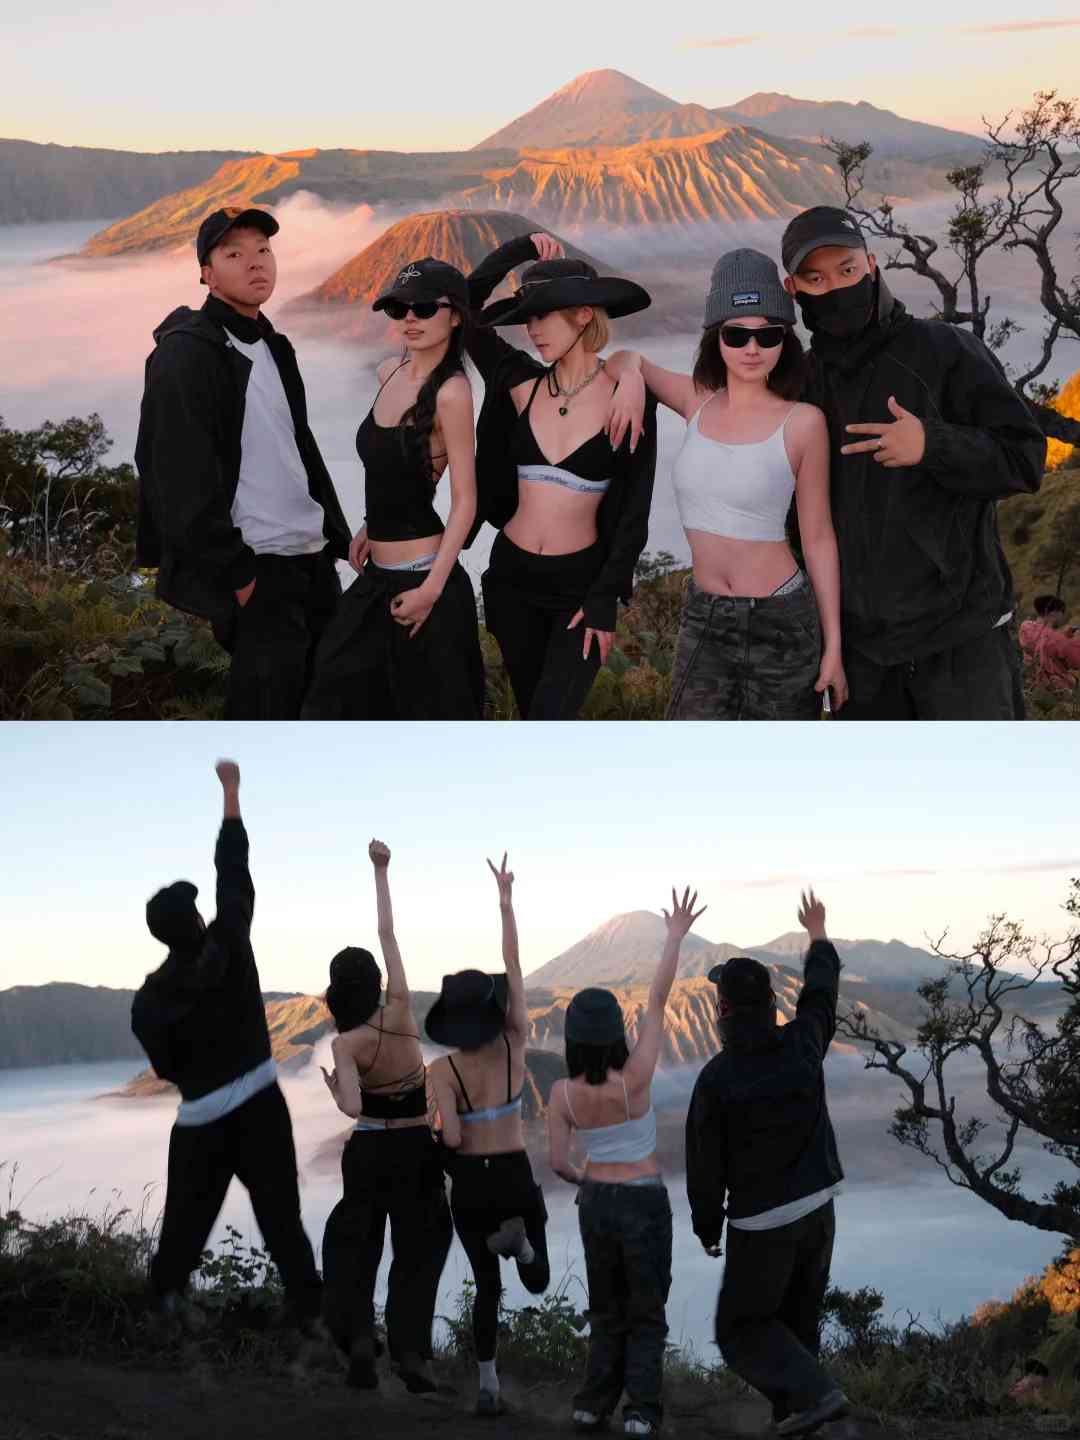
This is where you’ll find the famous tilted tree and other picturesque spots (as shown in pictures 2️⃣3️⃣4️⃣5️⃣). Don’t linger at the peak; the most stunning views are just a short way down.
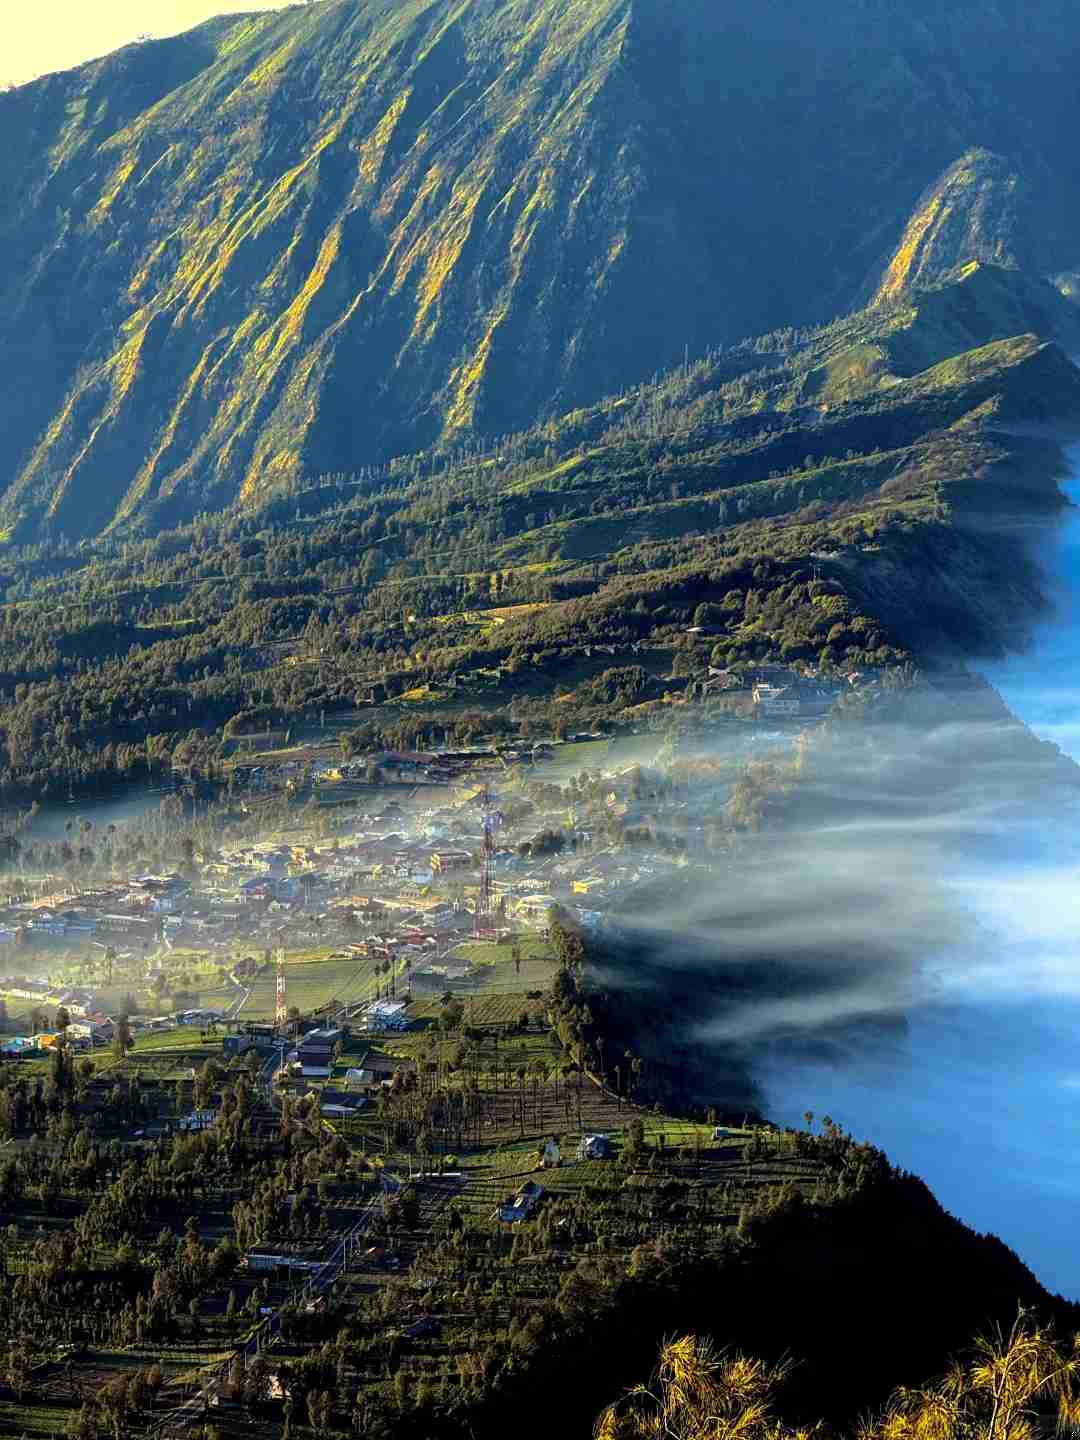
3️⃣ **Overlooking the Countryside**: After capturing the volcano, return to the top. From here, you can enjoy a panoramic view of the city below, which is incredibly soothing.
Even with a phone, you can take some amazing shots.
Lastly, I’d like to share some color grading tips for editing your photos on Apple devices:
– Brightness: +50
– Highlights: -62
– Exposure: -21
– Natural Saturation: +30
– Color Temperature: +30
– Tint: +30
Remember, the slopes can be treacherous, so always be cautious when climbing up and down.

