From Failure to Dreams: How the Child Who Struggled Finally Reached Odaiba’s Promise
Celebrating 25 Years of *Digimon*: A Nostalgic Pilgrimage Through Tokyo
This year marks the silver anniversary of *Digimon*’s legendary broadcast.
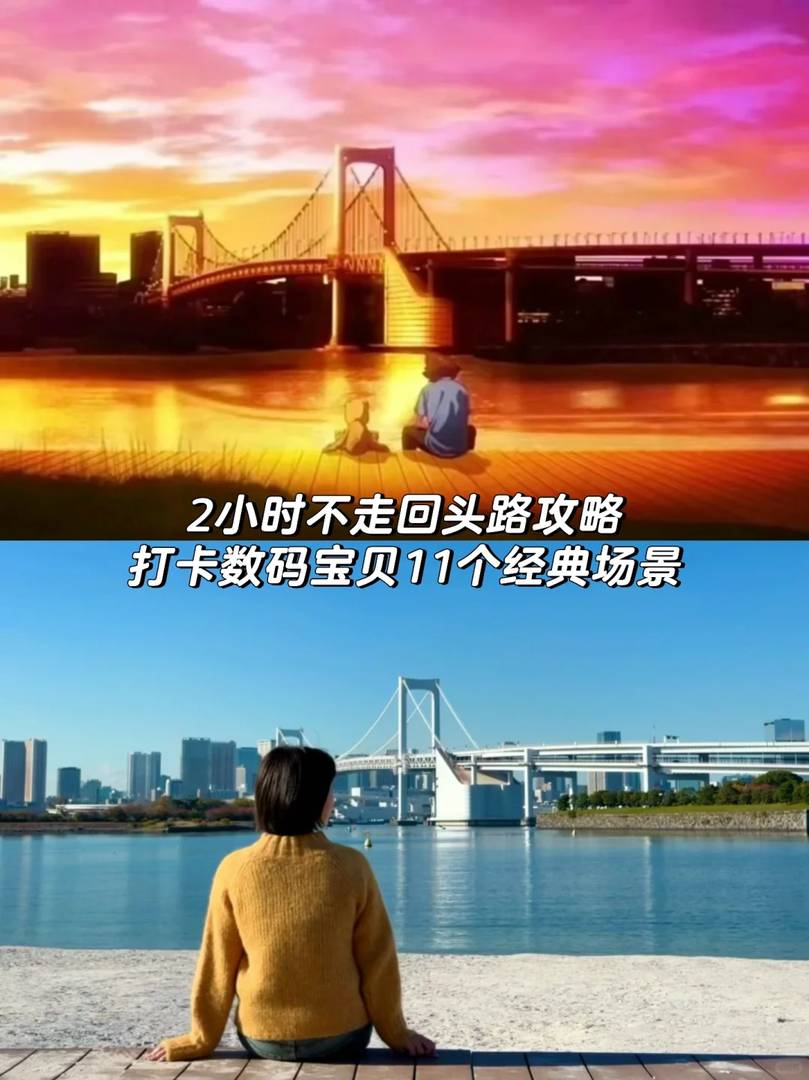
Join me on an unforgettable journey through 11 real-life locations that bring our favorite digital adventures to life!
🚇 Adventure Route Guide
(Note: Since Google Maps isn’t accessible after returning home, here’s a handy breakdown of key spots near each station.)
Our entire expedition follows the scenic Yurikamome Line, with three iconic stops every fan must visit.
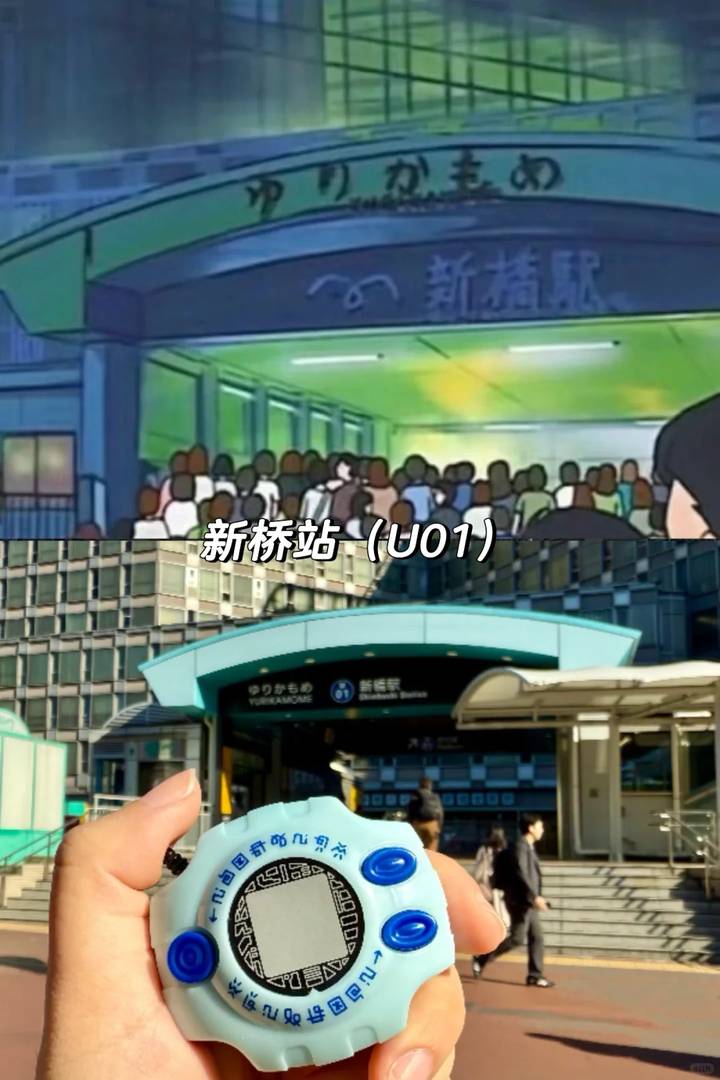
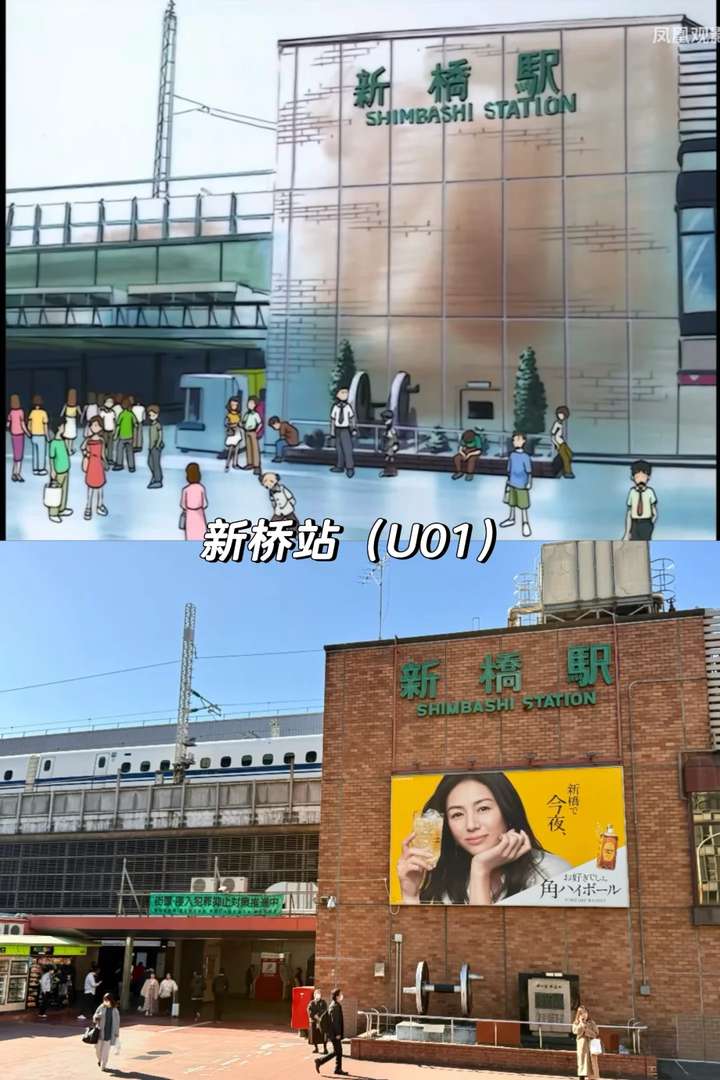
🚉 **Shimbashi Station (U1) – Where It All Begins**
📸 Photos 2 & 3
The perfect starter shots await right outside the station gates – instant nostalgia guaranteed!
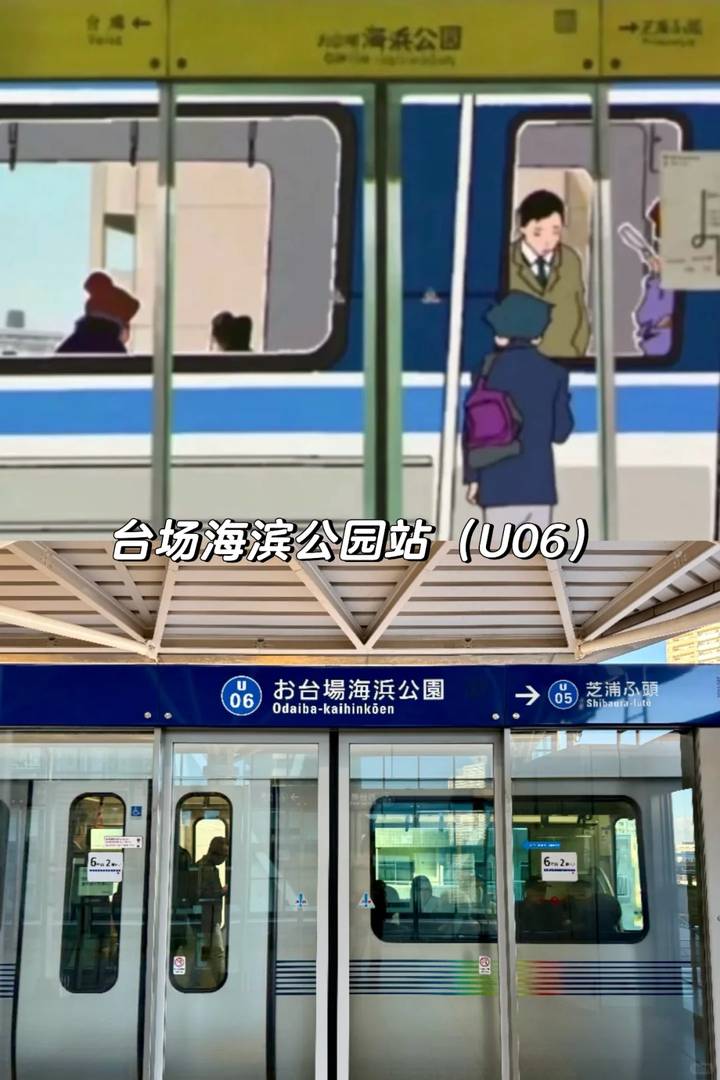
🚉 **Odaiba Kaihin Park (U6) – The Heart of the Digital World**
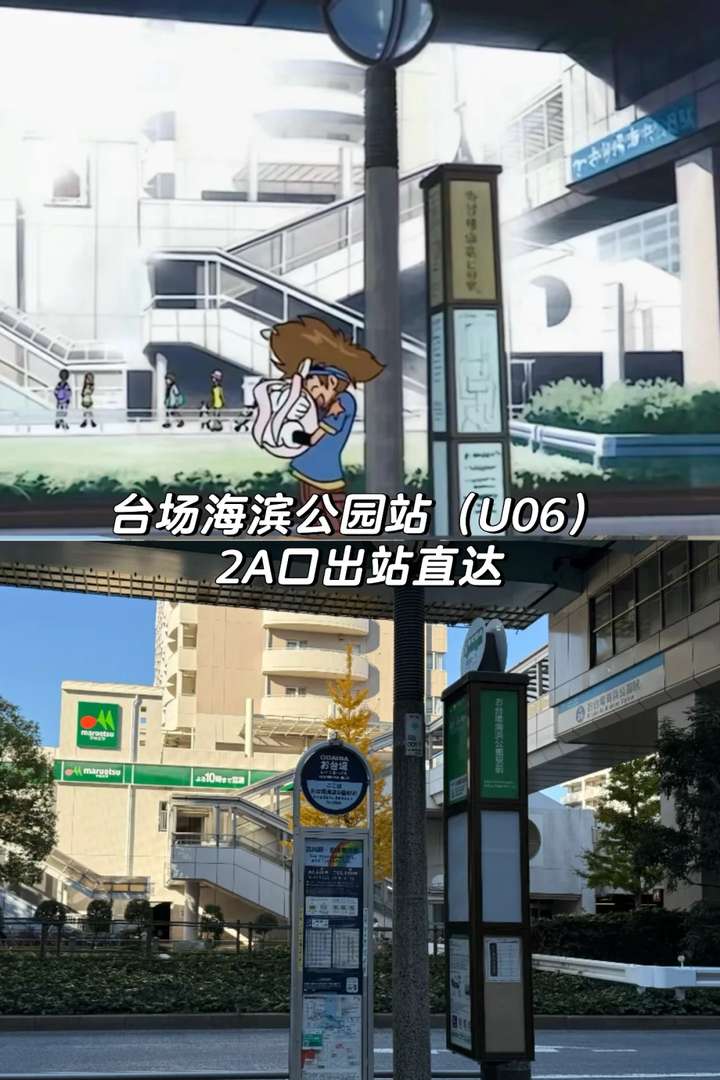
Photo 4: Don’t forget to capture the station name as soon as you disembark – your first official checkpoint!
Photo 5: Take exit 2A and stroll to the Odaiba bus stop to recreate Taichi’s legendary heroic pose.
Photo 6: Wander toward the waterfront past this FamilyMart 🎡 (the only change?
The Ferris wheel has vanished into digital history).
Photo 1: The Rainbow Bridge 📸 awaits by the shore. Solo trip turned serendipitous when I met fellow Chinese pilgrims who snapped my “hero shot” – though my outfit screamed Agumon more than Taichi!
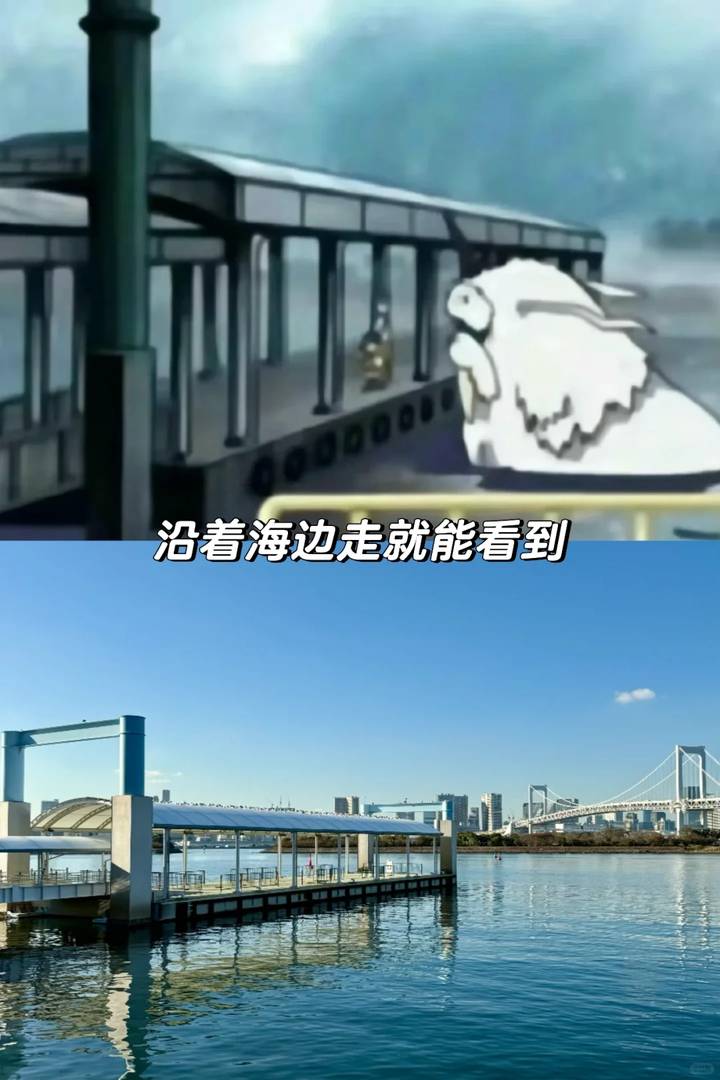
Photo 7: Continue to the boat pier for that perfect Ikkakumon-worthy seaside moment.
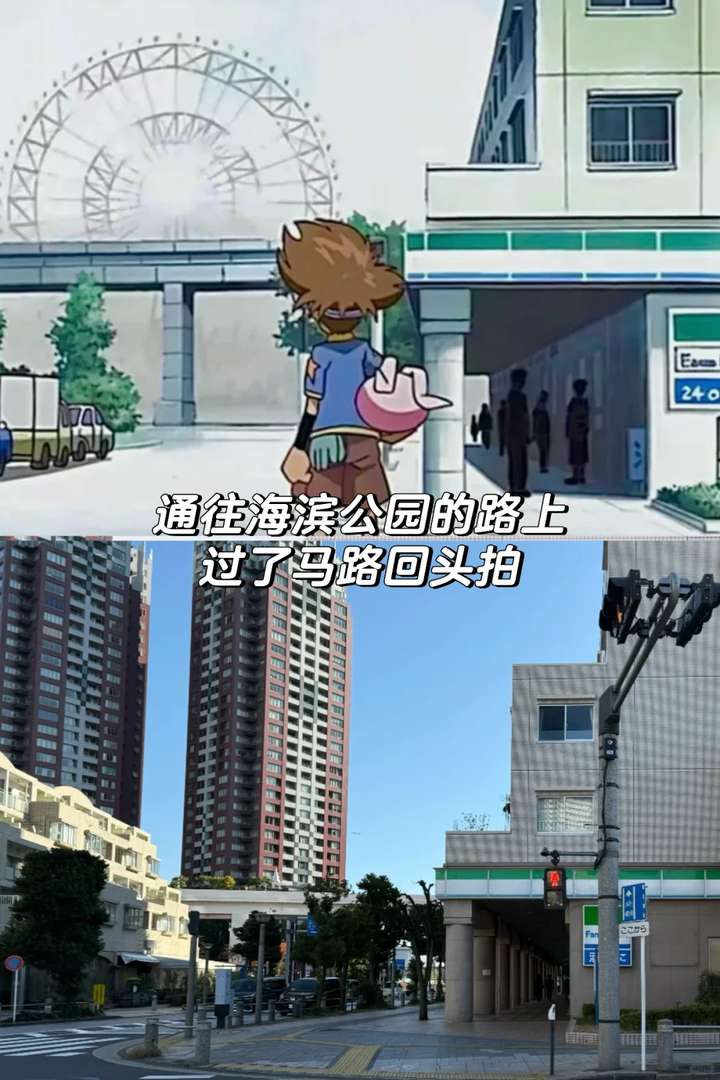
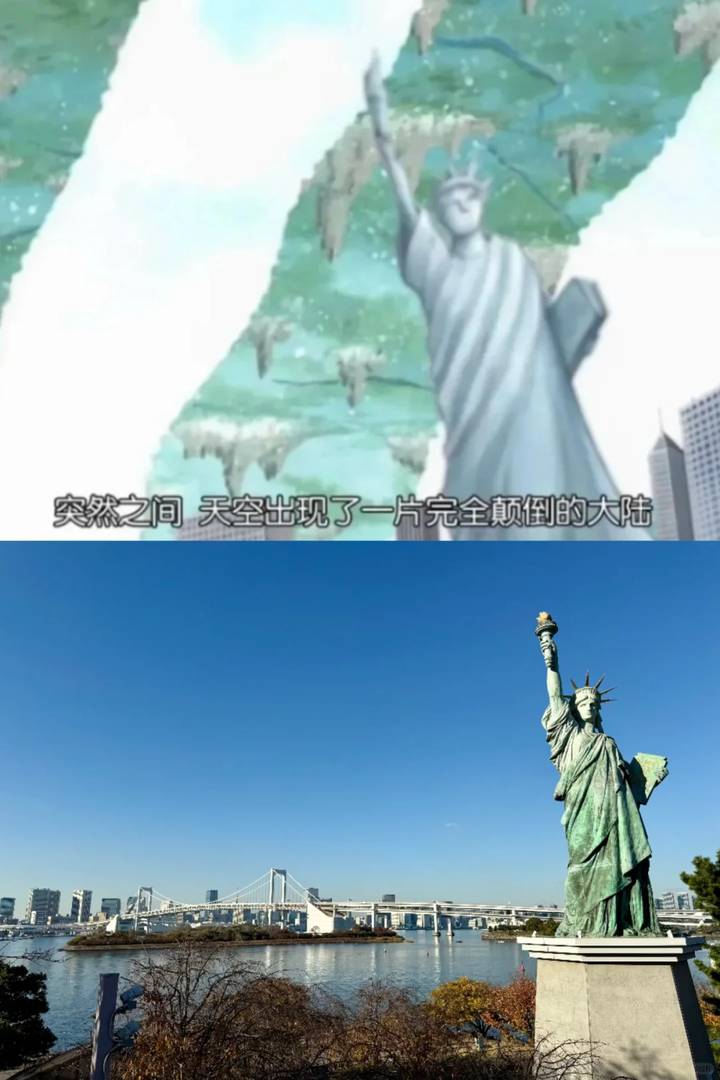
Photo 8: Ascend the bridge stairs behind you – welcome to the upside-down battlefield 🌏 where WarGreymon and MetalGarurumon clashed with VenomMyotismon!
Photo 9: Instead of descending, cut through Odaiba mall to Fuji TV’s giant sphere – Koushiro’s iconic barrier discovery spot during VenomVamdemon’s siege.
🚉 **Tokyo Big Sight (U11) – Final Showdown Territory**
Photo 10: The imposing Tokyo Big Sight stands ready.
Photo 11: The massive saw blade 🪚 – hallowed ground where Togemon bravely faced DarkTyrannomon.
Relive every epic moment through these sacred *Digimon* landmarks!


Comments are closed